 Pin it
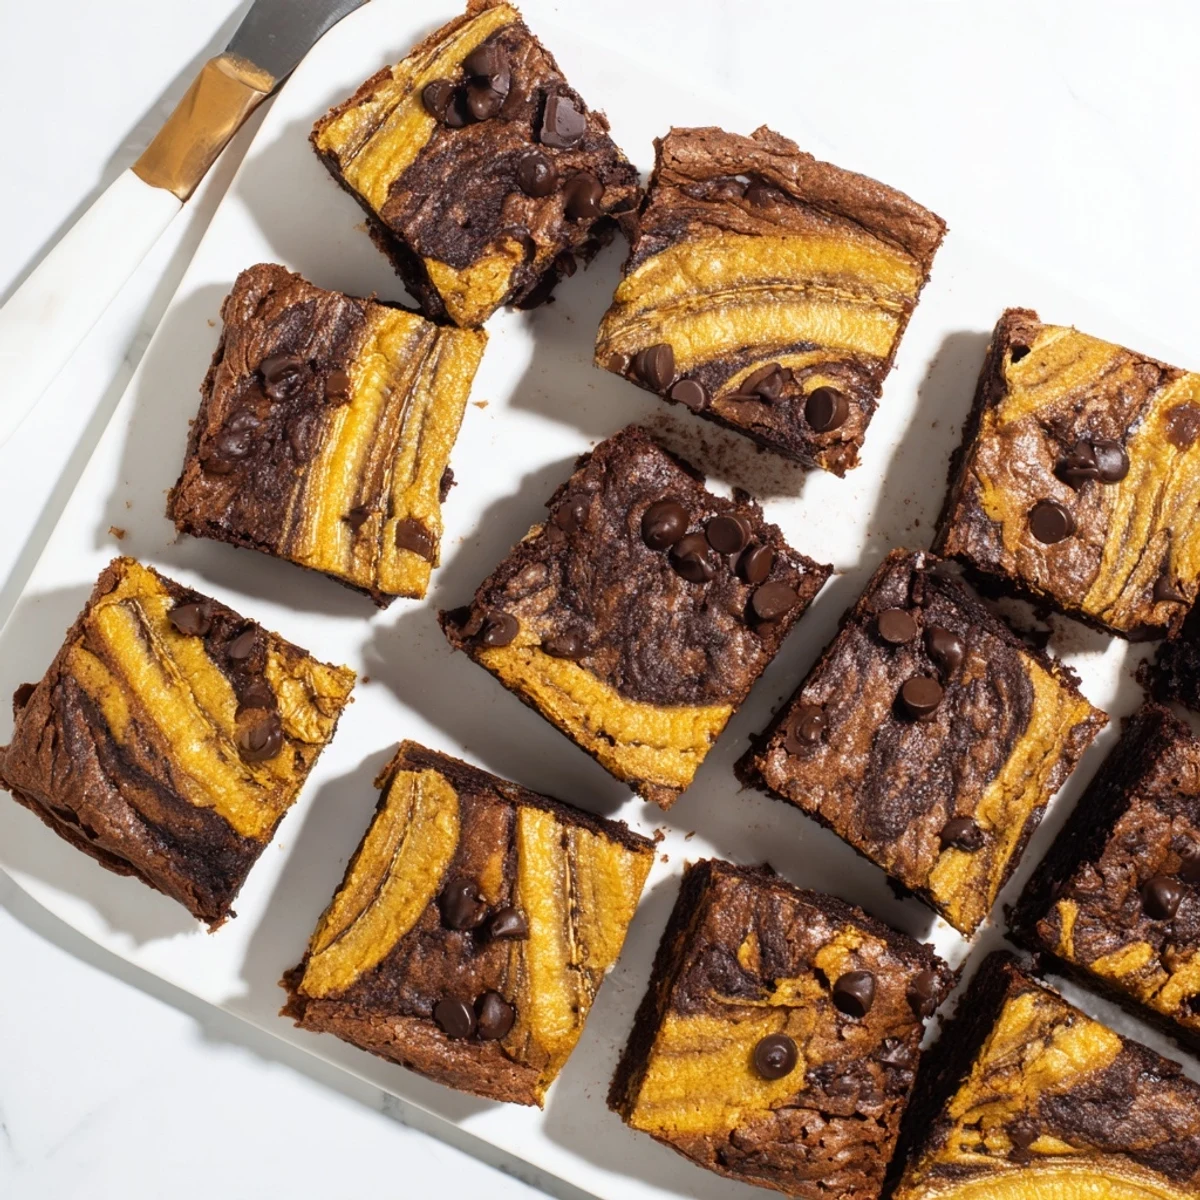
 These banana bread brownie bars combine the best of both worlds—rich, fudgy chocolate brownie layers marbled with sweet, moist banana bread batter. The result is an incredibly satisfying treat that's perfect for dessert, snacking, or sharing at gatherings.
Preparation takes just 15 minutes, and the bars emerge from the oven with a beautiful swirled pattern and irresistible aroma. The banana layer stays tender and moist, while the chocolate brownie portion offers that classic dense, chewy texture we all crave.
Each bar delivers a perfect balance of sweetness from ripe bananas and chocolate, with optional chocolate chips adding extra richness. Serve them slightly warm with ice cream for an extra indulgent experience, or enjoy them at room temperature for a portable lunchbox treat.
The smell of overripe bananas sitting on my counter used to stress me out until my grandmother whispered her secret about letting them go almost black. Now I actually wait for that spotted skin, knowing it's the gateway to something magical happening in my kitchen.
Last summer I made three batches in one week because my neighbor kept coming over with that hopeful look whenever she smelled them baking. We ate them warm on her back porch while her kids chased fireflies, and she confessed she'd been trying to recreate her grandmother's version for years without success.
Ingredients
- 1 cup ripe bananas, mashed: Wait until they're heavily spotted or almost black—they're sweeter and mash into a smoother consistency that distributes evenly through the batter
- 1/2 cup granulated sugar: Split between both layers, this amount hits the sweet spot without overpowering the banana flavor
- 1/3 cup unsalted butter, melted: For the banana layer—melt it completely and let it cool slightly so it doesn't scramble the egg when you mix everything together
- 1 large egg: Room temperature eggs incorporate better and give the bars a more tender crumb
- 1 tsp vanilla extract: Use real vanilla here since it's one of the few flavorings in the banana layer
- 1 cup all-purpose flour: Spoon and level your flour instead of scooping directly, or you'll end up with dense bars instead of tender ones
- 1/2 tsp baking powder: This gives the banana layer its lift and ensures it's not too heavy next to the fudgy brownie portion
- 1/4 tsp baking soda: Works with the acidic bananas to create extra rise and a lighter texture
- 1/4 tsp salt: Balances sweetness and intensifies the banana flavor without making these taste salty
- 1/2 cup unsalted butter, melted: For the brownie layer—butter gives a richer flavor than oil and helps create that crackly top everyone loves
- 3/4 cup granulated sugar: Brownie layers need more sugar to achieve that shiny, fudgy texture we're all chasing
- 2 large eggs: These provide structure while keeping the brownie layer moist and slightly dense
- 1 tsp vanilla extract: Enhances the chocolate flavor without competing with it
- 1/3 cup unsweetened cocoa powder: Sifting this first prevents lumps and ensures even distribution throughout the batter
- 1/2 cup all-purpose flour: Just enough to give the brownie layer structure while keeping it fudgy rather than cakey
- 1/4 tsp salt: Crucial for chocolate—without it, the brownie layer falls flat and tastes one-dimensional
- 1/2 cup semi-sweet chocolate chips: Fold these in gently so they don't sink to the bottom, creating pockets of melted chocolate throughout
Instructions
- Get your oven ready:
- Preheat to 350°F and line an 8x8 pan with parchment paper, letting the ends hang over the sides like handles—this makes lifting the bars out so much easier later.
- Make the banana batter:
- Mash those spotted bananas until mostly smooth, then whisk with sugar, melted butter, egg, and vanilla until everything's combined and glossy.
- Finish the banana layer:
- Add flour, baking powder, baking soda, and salt, stirring just until you don't see dry streaks anymore—overmixing makes the banana layer tough instead of tender.
- Start the brownie mixture:
- Whisk melted butter and sugar until it looks like wet sand, then beat in eggs and vanilla until the mixture turns silky and slightly thickened.
- Complete the brownie batter:
- Sift in cocoa, flour, and salt, folding gently until just combined, then stir in chocolate chips until they're evenly distributed.
- Layer it all up:
- Spread half the banana batter in your prepared pan, spoon all the brownie mixture on top, then drop the remaining banana batter in spoonfuls over the surface.
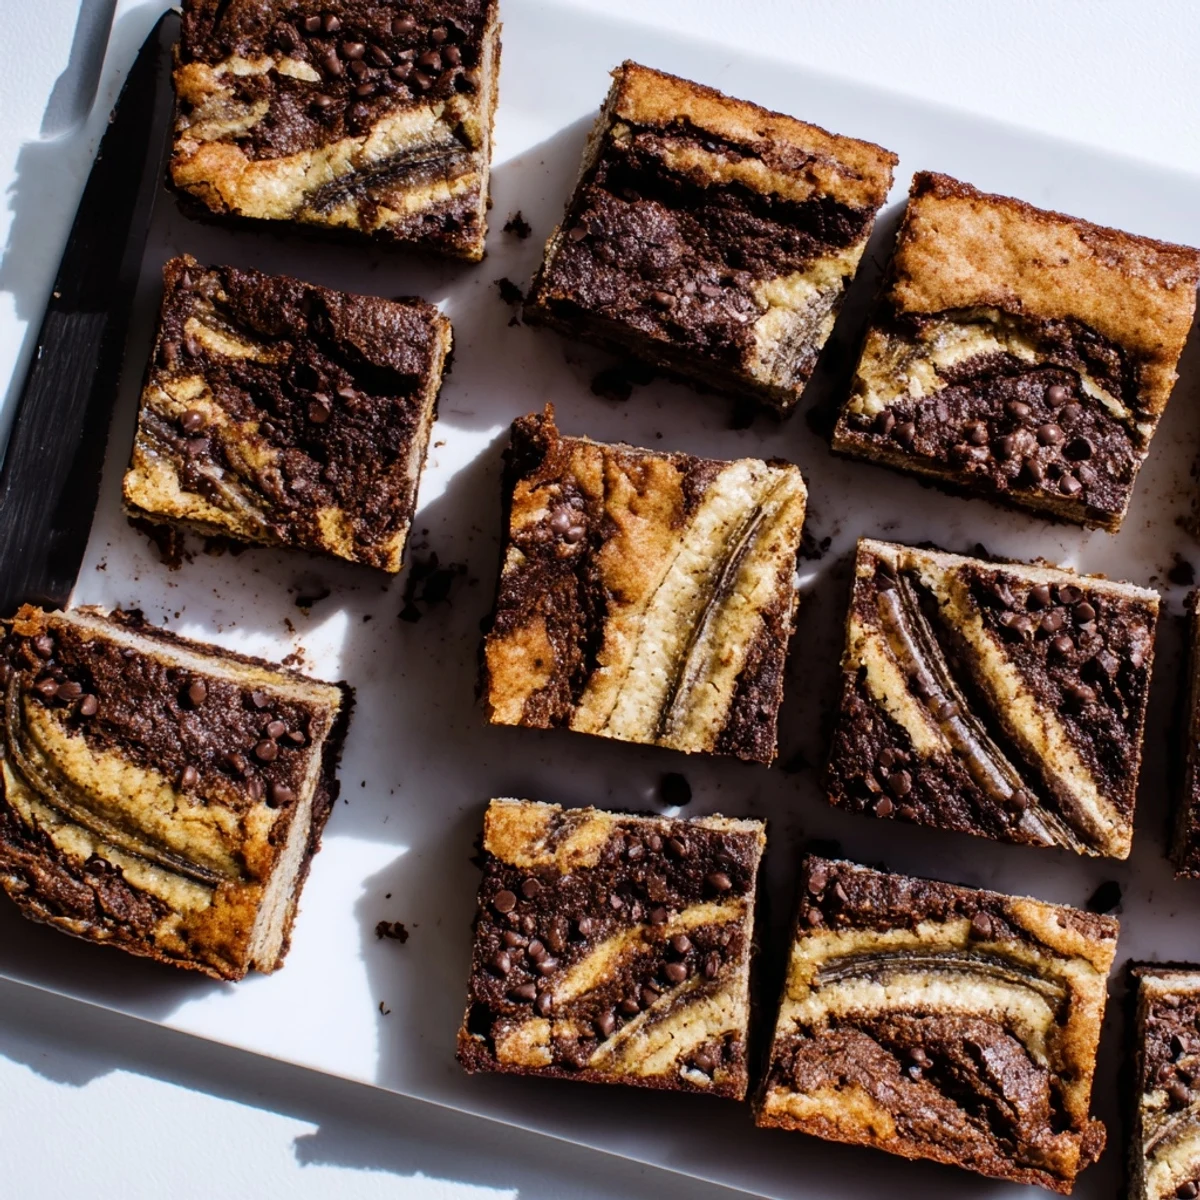
- Create that marble:
- Run a knife through the batters in a figure-eight pattern about three times—don't overdo it or you'll lose the distinct layers instead of getting those beautiful swirls.
- Bake until perfect:
- Slide the pan into the oven for 28 to 32 minutes, checking at the 28-minute mark—the center should have a few moist crumbs but no wet batter on a toothpick.
- Patience pays off:
- Let these cool completely in the pan before lifting them out using the parchment overhang, then slice into 16 squares with a sharp knife.
 Pin it
 My youngest declared these the best thing to ever come out of our kitchen, which is saying something considering we bake together at least twice a week. Now whenever bananas start turning on the counter, she asks if it's time to make the swirly bars.
Making Them Your Own
After dozens of batches, I've learned that adding a handful of chopped walnuts to the banana layer creates this incredible crunch that plays off the fudgy chocolate. Sometimes I'll throw in a teaspoon of cinnamon to the banana mixture too, especially when autumn feels like it's creeping in through the windows.
Serving Suggestions
These bars are completely divine while still slightly warm, when the chocolate chips are molten and the banana layer is fragrant. I've also been known to crumble a cold bar over vanilla ice cream for an impromptu dessert that tastes like banana split but better.
Storage and Make-Ahead Tips
The texture actually improves after a day wrapped tightly on the counter, as the flavors meld together. These freeze beautifully too—just wrap individual bars in plastic and they'll last up to three months in the freezer, though they never make it past week one at my house.
- Wrap the entire uncut slab in foil and freeze it whole if you're making these for a future event
- Room temperature storage keeps the texture best—refrigeration makes the banana layer slightly dense
- A quick 10-second zap in the microwave brings back that fresh-baked magic every time
 Pin it
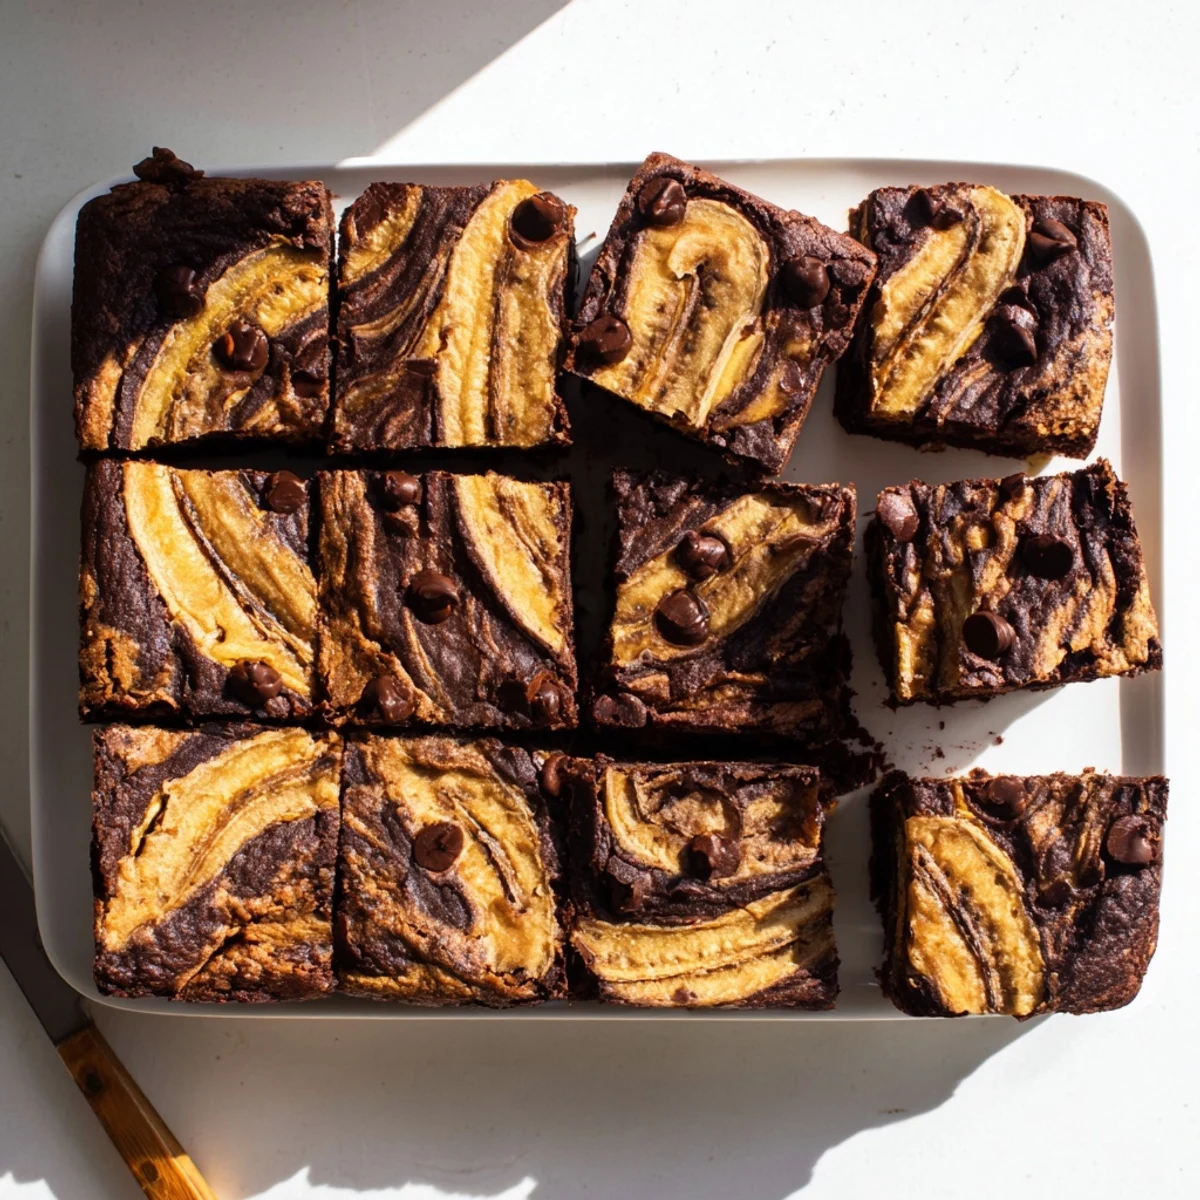
 There's something deeply satisfying about two classic treats coming together in one pan, creating something that feels entirely new yet comfortingly familiar.
Recipe FAQ
- → Can I use frozen bananas?
-
Yes, frozen bananas work perfectly. Thaw them completely and drain any excess liquid before mashing. Frozen bananas often become sweeter and more flavorful, which enhances the final result.
- → How do I know when the bars are done baking?
-
Insert a toothpick near the center—it should come out with a few moist crumbs but not wet batter. The edges should be set, and the top should feel firm but still slightly soft to the touch. They'll continue to set as they cool.
- → Can I make these ahead of time?
-
Absolutely. Store cooled bars in an airtight container at room temperature for up to 3 days. For longer storage, refrigerate for up to a week or freeze individually wrapped bars for up to 3 months.
- → What if I don't have an 8x8 pan?
-
A 9x9-inch pan works but will yield slightly thinner bars with reduced baking time. Alternatively, use a 9-inch round pan for a different presentation—just adjust baking time to 25-28 minutes and check for doneness.
- → Can I make these dairy-free?
-
Yes, substitute the butter with vegan butter or coconut oil. Use dairy-free chocolate chips. The texture remains excellent, though coconut oil may add a subtle coconut flavor depending on the brand used.
- → Why did my layers mix together too much?
-
If the batters are too warm or similar in consistency, they may blend more than swirl. Chill the brownie batter for 5-10 minutes before layering. When swirling, use just 2-3 gentle figure-eight motions rather than over-mixing.
