 Pin it
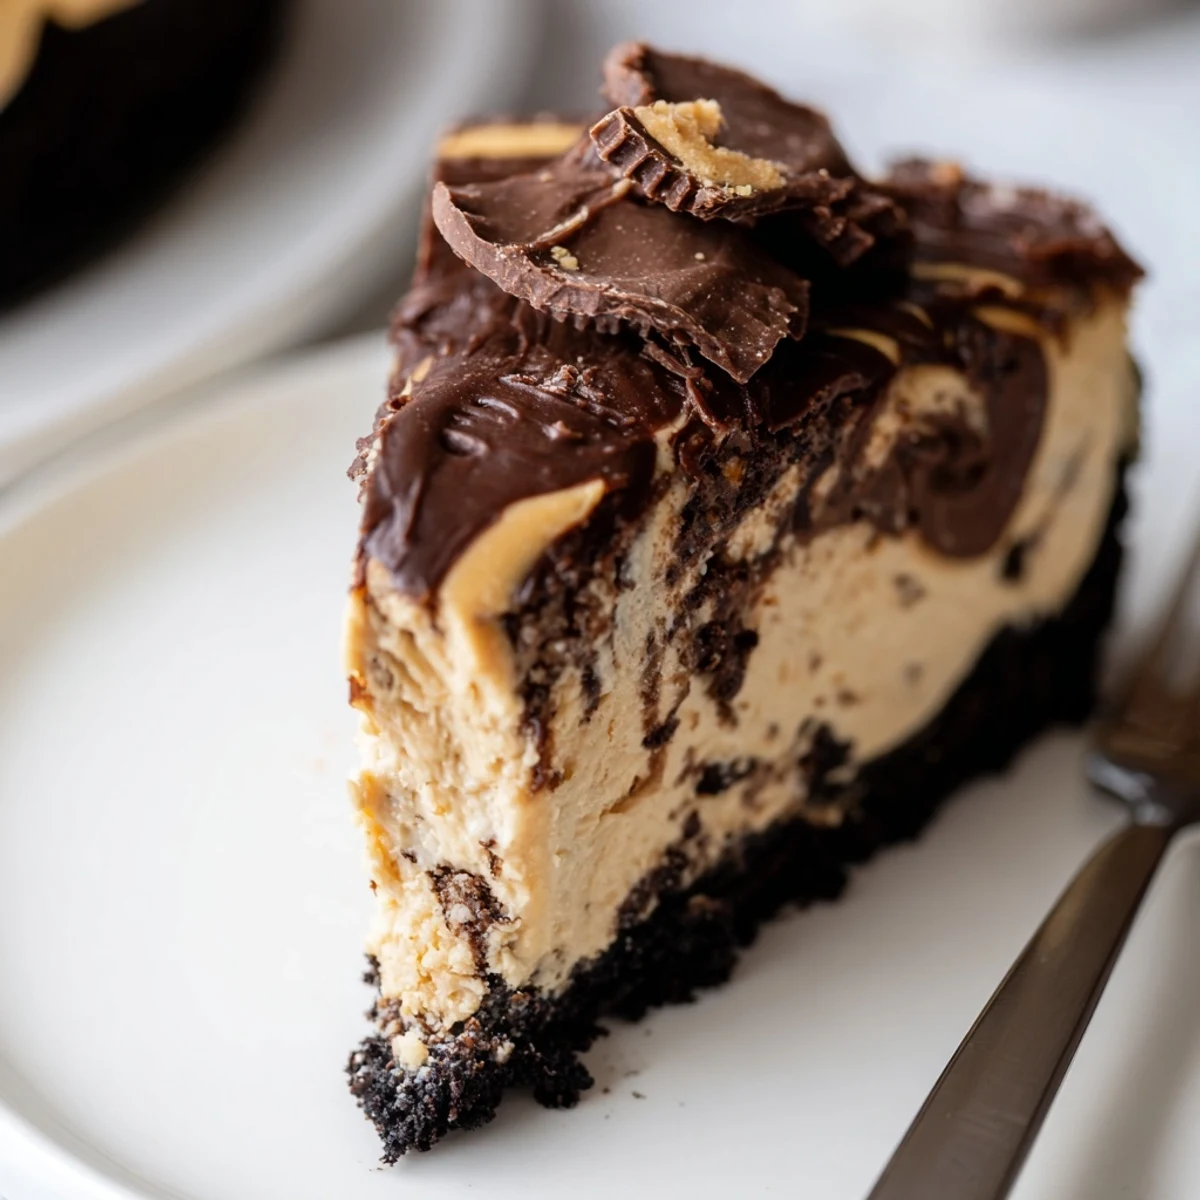
 This chocolate peanut butter cheesecake brings together a crunchy Oreo cookie crust, a velvety cream cheese filling swirled with melted dark chocolate, and a luscious peanut butter ganache topping.
The filling is prepared by beating softened cream cheese with sugar, peanut butter, and sour cream until silky smooth, then incorporating eggs one at a time. Layers of batter and melted chocolate are swirled together for a stunning marbled effect.
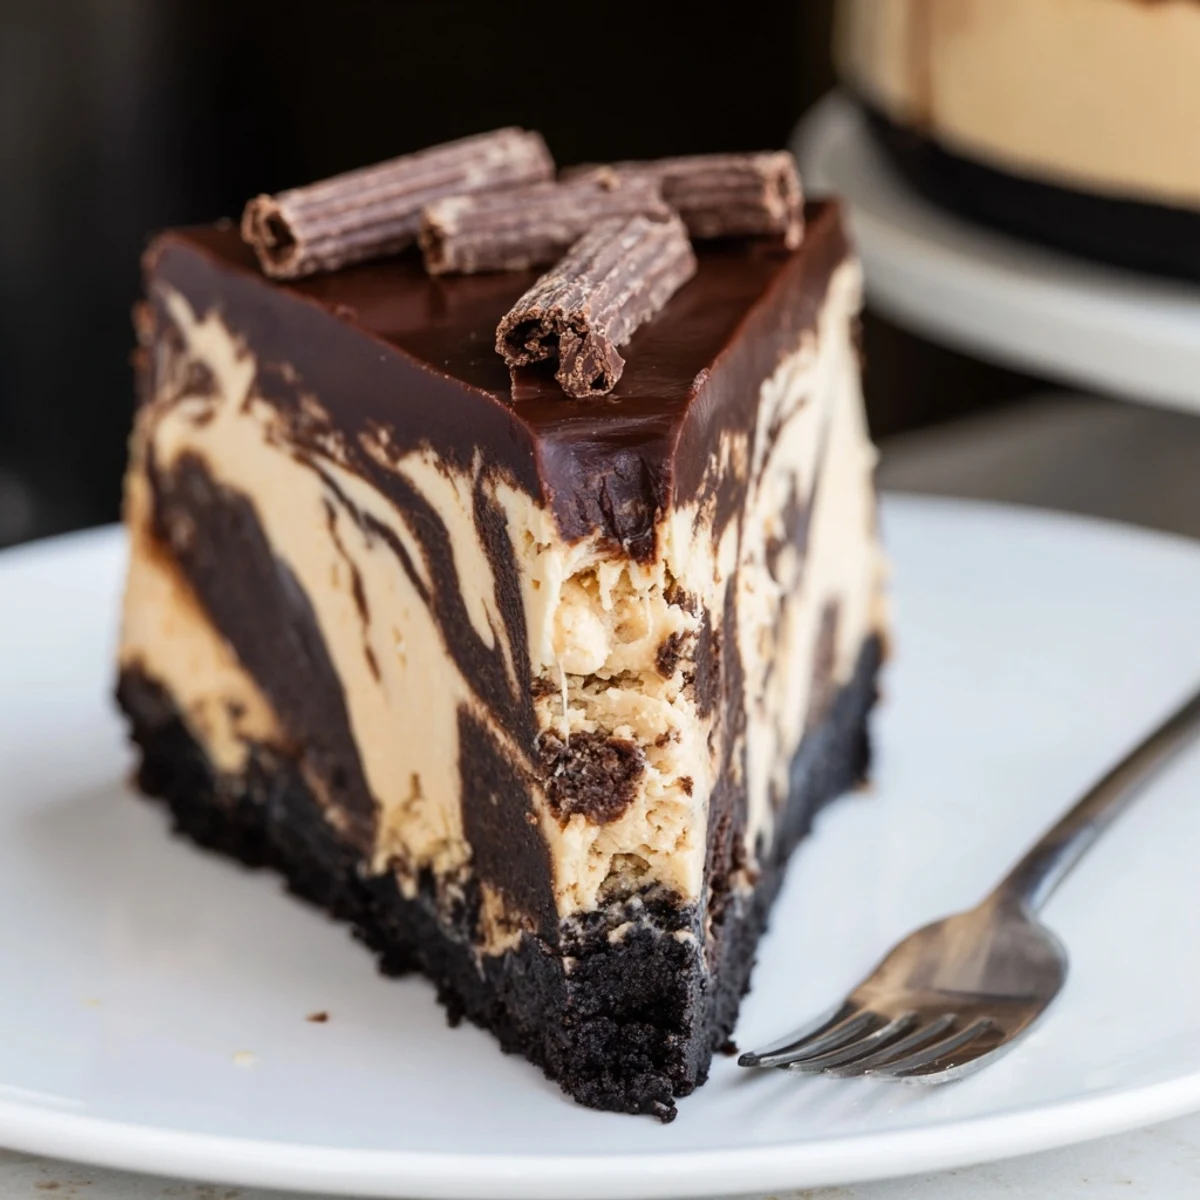
After baking low and slow at 160°C, the cheesecake cools gradually in the oven to prevent cracking, then chills for at least four hours. The peanut butter chocolate ganache is spread over the top before a final set. Serve chilled for the best texture and flavor.
My sister called me at eleven on a Friday night, frantic, because she had volunteered to bring dessert to a dinner party the next evening and had absolutely nothing planned. I told her to grab cream cheese, peanut butter, and whatever chocolate she had hiding in her pantry. What emerged from my kitchen at two in the morning was a cheesecake so ridiculous, so over the top, that we stood in my kitchen eating slices in our socks before it even fully set.
My sister brought that cheesecake to the dinner party, and three people asked her for the recipe before the main course was even served. She texted me later that evening with a simple message: you saved my life, I owe you forever. I have made this cake for birthdays, potlucks, and one very memorable breakup recovery evening, and it has never once disappointed.
Ingredients
- Chocolate sandwich cookies (200 g): Oreos are the classic choice here, and you want them crushed fairly fine so the crust holds together without crumbling into chaos when you cut a slice.
- Unsalted butter (60 g), melted: This binds the crust and adds a subtle richness, so do not skimp on it.
- Cream cheese (500 g), softened: Full fat is non negotiable for that dense, creamy texture, and it must be properly softened or you will fight lumps the entire time.
- Creamy peanut butter (200 g): Use a commercial brand like Skippy or Jif for the smoothest results, as natural peanut butter can separate and create oily pockets.
- Granulated sugar (150 g): This sweetens the filling without overpowering the peanut butter and chocolate balance.
- Sour cream (120 ml): A quiet hero that adds tang and keeps the texture velvety.
- Large eggs (3): Room temperature eggs blend in more evenly and help prevent cracking on top.
- Vanilla extract (1 tsp): Just a little warmth to round out all the bold flavors.
- Dark chocolate (150 g for filling, 120 g for ganache): Use something you would happily eat on its own, because the chocolate is carrying a lot of the flavor here.
- Heavy cream (100 ml): This transforms the chopped chocolate into a glossy, pourable ganache.
- Creamy peanut butter (2 tbsp, for ganache): A final swirl of peanut butter in the topping ties everything together beautifully.
Instructions
- Prep your pan and oven:
- Preheat the oven to 160 degrees C (325 degrees F). Grease a 23 cm springform pan and line the base with parchment paper so nothing sticks when you release it later.
- Build the crust:
- Toss the crushed cookies with melted butter until everything feels like damp sand. Press the mixture firmly and evenly into the base of the pan, then bake for 10 minutes until it smells toasty and set. Let it cool while you work on the filling.
- Start the filling:
- Beat the cream cheese and sugar together until completely smooth and creamy. Add the peanut butter and sour cream, mixing until everything is unified and luscious.
- Add the eggs and vanilla:
- Drop in the eggs one at a time, mixing gently after each until just incorporated. Stir in the vanilla, then stop mixing once you see it blended through.
- Create the swirl:
- Pour half the filling over the cooled crust. Drizzle half the melted chocolate over the batter and swirl it loosely with a knife. Add the remaining batter, drizzle the rest of the chocolate, and swirl again for that gorgeous marbled look.
- Bake low and slow:
- Bake for 50 to 55 minutes until the edges look set but the center still has a gentle wobble when you shake the pan. Turn off the oven, crack the door open, and let it sit inside for 1 hour to cool gradually.
- Chill patiently:
- Remove the cheesecake from the oven and transfer it to the refrigerator. Chill for at least 4 hours, or ideally overnight, so the flavors deepen and the texture sets properly.
- Make the ganache:
- Heat the cream until hot but not boiling, then pour it over the chopped chocolate. Let it sit for 2 minutes, then stir until glossy and smooth. Mix in the peanut butter until fully combined.
- Finish and set:
- Spread the ganache evenly over the chilled cheesecake. Let it set for at least 30 minutes before slicing, using a hot clean knife for the neatest cuts.
 Pin it
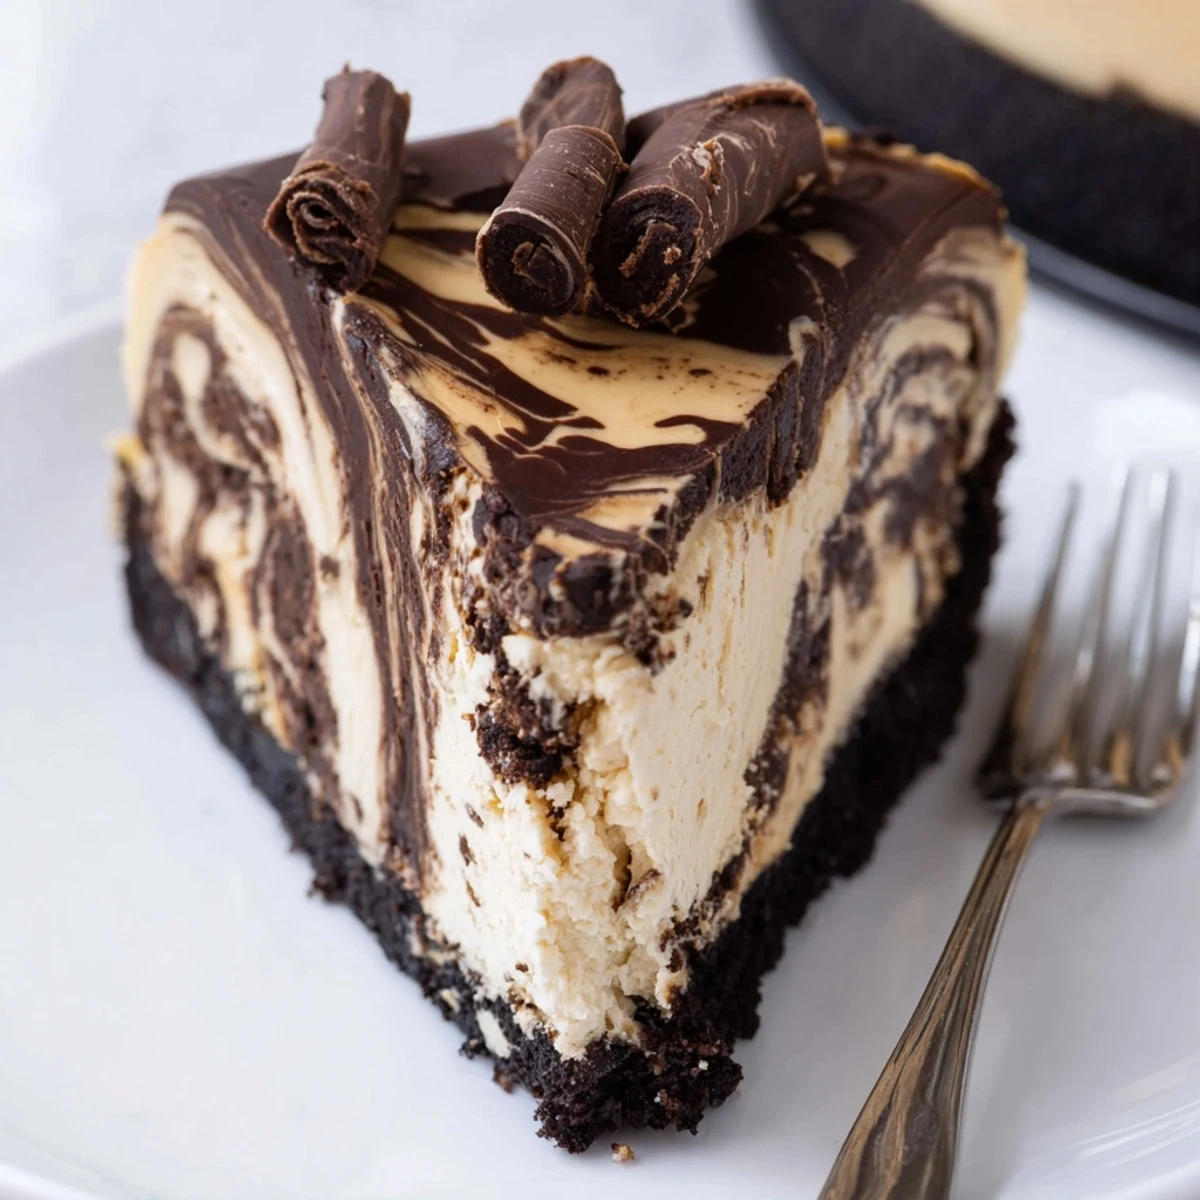
 The first time I made this for my friend Rachel, she sat on my kitchen floor with a fork and the whole cake pan and told me she was not sharing it with anyone. We ended up eating half of it right there, and she left with the rest wrapped in foil like a treasure she had to protect.
Choosing the Right Chocolate
I once used cheap baking chocolate from the back of my cupboard and the ganache turned grainy and dull, which taught me a lasting lesson. Use a dark chocolate you actually enjoy eating straight, somewhere between 60 and 70 percent cocoa. The better the chocolate, the richer and more complex every bite of this cheesecake becomes.
Serving and Garnishing Ideas
A handful of chopped roasted peanuts scattered over the ganache adds a satisfying crunch that cuts through all that creaminess. Chocolate curls shaved with a vegetable peeler look elegant with almost zero effort. Sometimes I warm a small spoonful of peanut butter and drizzle it over the top in thin lines for extra drama.
Storing and Make Ahead Advice
This cheesecake actually tastes better on the second day when the flavors have had time to mingle and settle in the fridge. Keep it covered tightly and it will hold beautifully for up to five days, though in my experience it never lasts that long.
- Freeze individual slices wrapped tightly in plastic wrap for up to two months and thaw overnight in the refrigerator.
- Always slice with a knife dipped in hot water and wiped clean between cuts for bakery worthy edges.
- Let refrigerated slices sit at room temperature for 15 minutes before serving so the texture softens to its best consistency.
 Pin it
 Some recipes are just food, but this one has a way of turning an ordinary evening into something people remember and ask about months later. Share it generously, and maybe keep a slice hidden in the back of your fridge for yourself.
Recipe FAQ
- → Can I make this cheesecake ahead of time?
-
Yes, this cheesecake actually benefits from being made in advance. It needs at least 4 hours of chilling, but overnight is even better. You can make it up to 3 days ahead and store it covered in the refrigerator. The flavors meld and the texture firms up beautifully with extra resting time.
- → Why did my cheesecake crack on top?
-
Cracks usually happen from overmixing the batter (which incorporates too much air), baking at too high a temperature, or rapid cooling. Mixing eggs on low speed and just until incorporated helps prevent air pockets. The gradual cooling method—turning off the oven and cracking the door—lets the cheesecake settle gently without sudden temperature changes.
- → Can I use natural peanut butter instead of creamy?
-
Standard creamy peanut butter works best because it has stabilizers that create a smooth, consistent texture in the filling. Natural peanut butter tends to separate and can make the batter oily or uneven. If you only have natural peanut butter, stir it very thoroughly and consider adding an extra tablespoon of flour to help bind the filling.
- → How do I get clean slices when cutting the cheesecake?
-
Use a sharp knife dipped in hot water and wiped dry between each cut. The warm blade glides through the dense filling and ganache cleanly. Let the knife sit in hot water for a few seconds, wipe it with a clean towel, then slice. Repeat for every single cut for the neatest presentation.
- → Can I freeze this cheesecake?
-
Absolutely. Freeze the cheesecake without the ganache topping for best results. Wrap it tightly in plastic wrap, then aluminum foil, and freeze for up to 2 months. Thaw overnight in the refrigerator, then add the ganache topping fresh before serving. If already topped, freeze individual slices on a tray, then wrap and store.
- → What can I substitute for the Oreo cookie crust?
-
Graham crackers mixed with melted butter and a tablespoon of cocoa powder make a great alternative. Chocolate graham crackers, digestive biscuits with cocoa, or even crushed pretzels for a salty-sweet twist all work well. Use the same ratio of about 200 g crumbs to 60 g melted butter.
