 Pin it
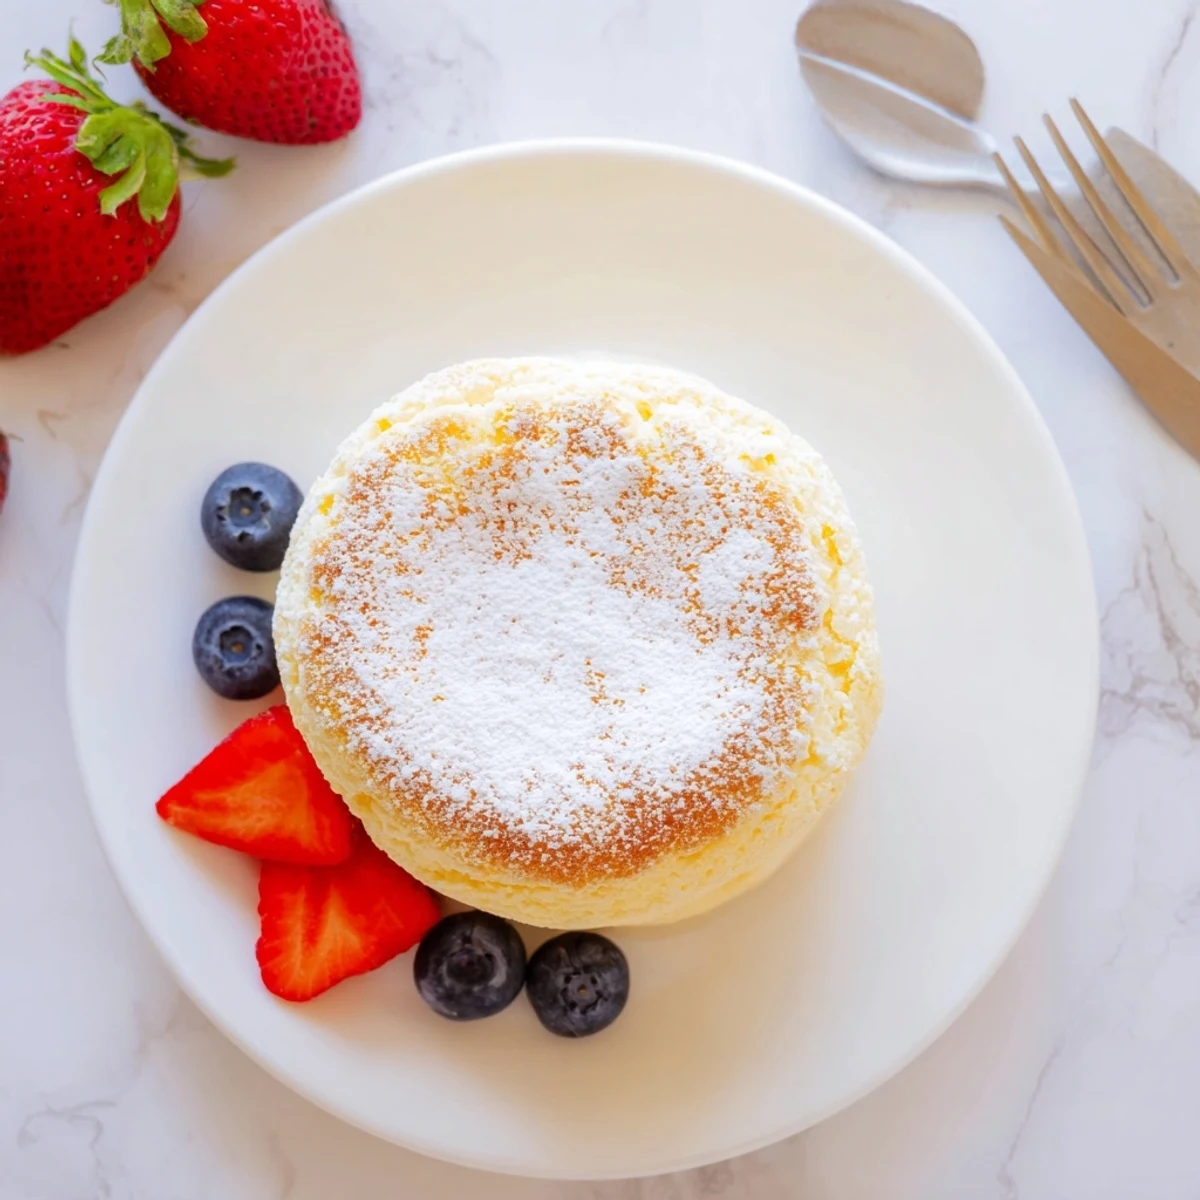
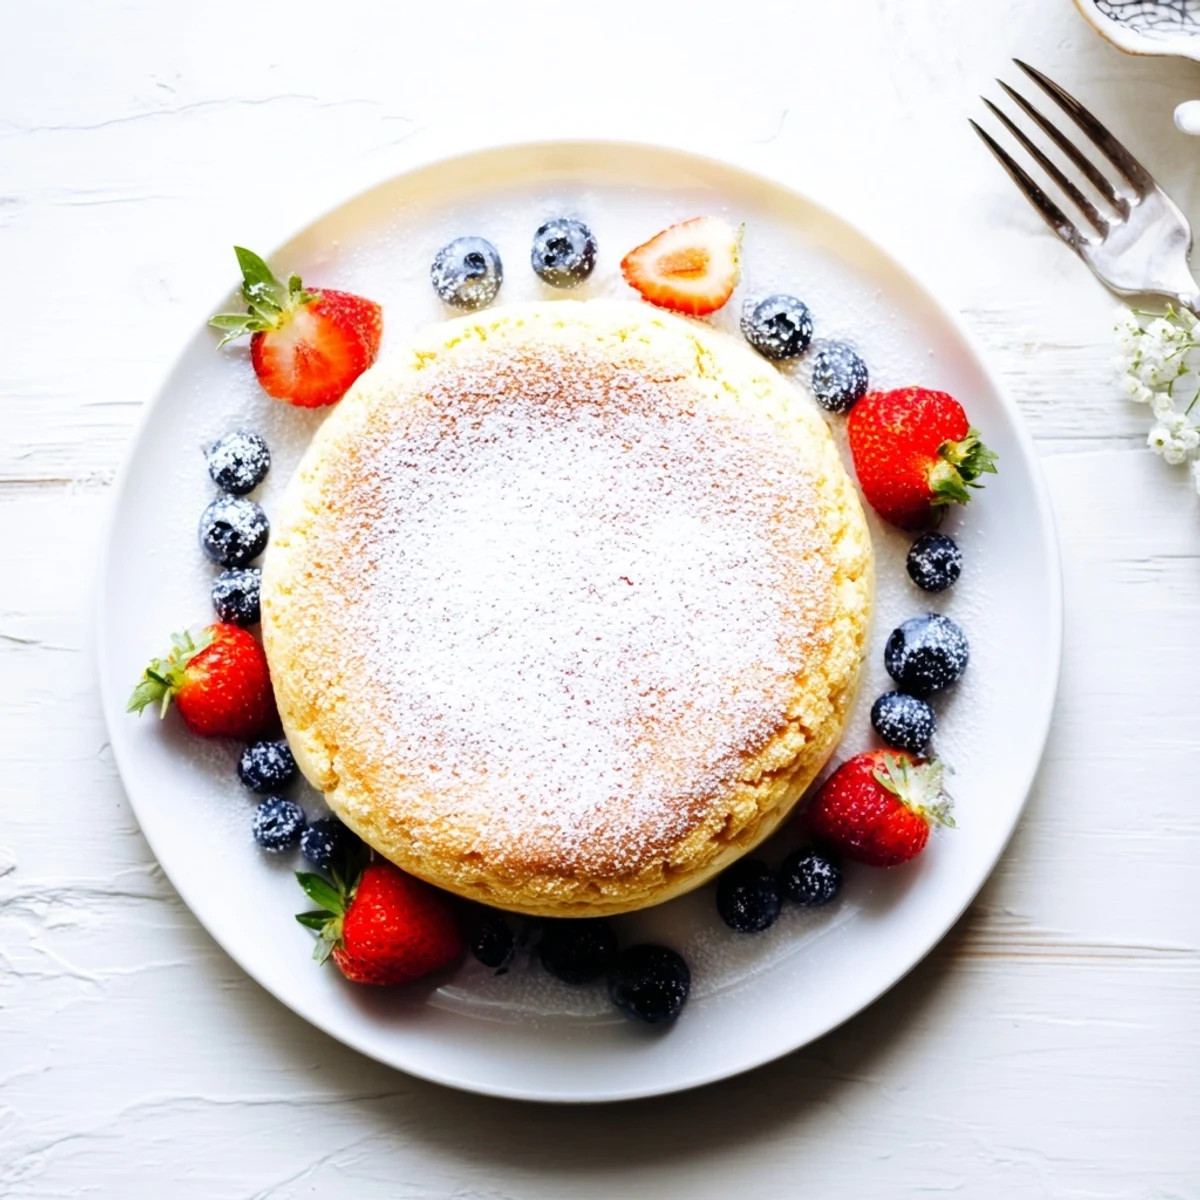
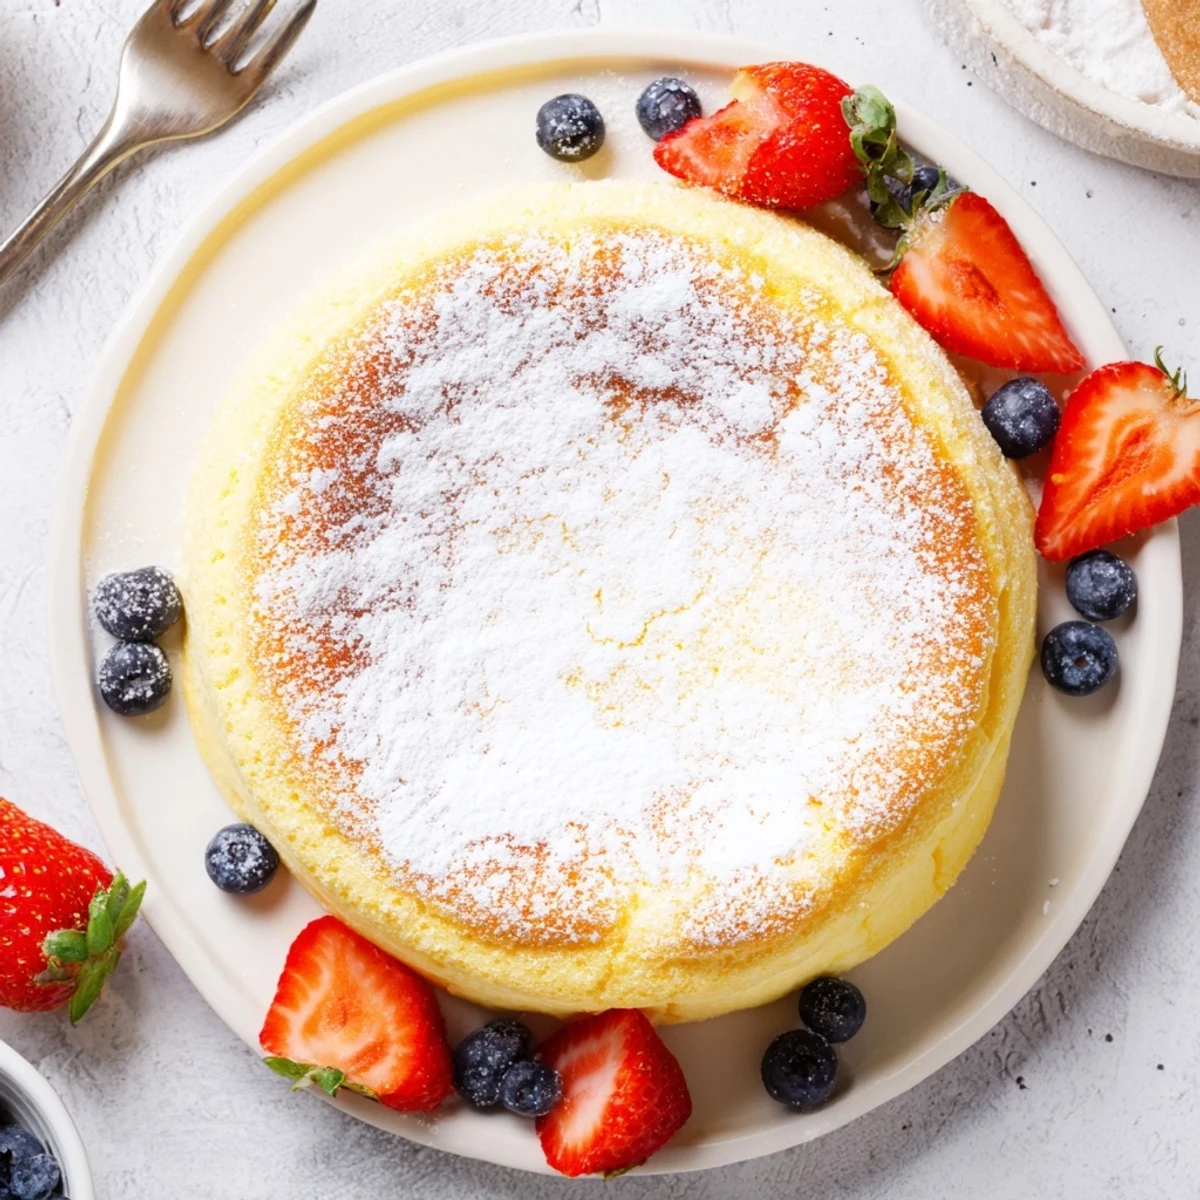
 Create an incredibly light and fluffy Japanese cheesecake with a delicate soufflé-like texture that melts in your mouth. This cloudlike dessert offers a perfectly balanced sweetness that isn't overwhelming, making it ideal for those who prefer subtler treats. The secret lies in the whipped egg white meringue folded gently into a creamy cheese base, then baked using a water bath method for ultimate moisture. The result is a golden, jiggly cheesecake that's less dense than traditional American versions while delivering pure comfort in every bite.
The first time I saw a Japanese cheesecake, I thought someone had accidentally left a regular cheesecake in the oven too long. It had this wobbly, uncertain quality, like it might collapse if I looked at it wrong. But one bite changed everything. It wasn't dense or heavy at all. It was like eating a cloud that someone had miraculously infused with cheesecake flavor.
I made this for my grandmother's birthday last spring. She's been baking for sixty years and had never seen anything like it. Watching her take that first cautious bite, seeing her eyes widen, and hearing her say 'This isn't possible' might be my favorite kitchen moment ever. Now she asks for it every time I visit.
Ingredients
- Cream cheese: Room temperature is nonnegotiable here. Cold cream cheese will leave you with lumps that no amount of whisking can fix
- Unsalted butter: Also room temperature. This dairy trio needs to mingle and become one smooth, happy family before anything else happens
- Whole milk: The fat content matters for tenderness. Skim milk will give you a slightly less luxurious result
- Cake flour: Do not substitute with allpurpose flour. Cake flour has less protein, which means less gluten development, which means that signature cloudlike texture
- Cornstarch: Works alongside cake flour to keep things tender and helps stabilize the structure
- Granulated sugar: Divided use is crucial. Most goes into the meringue for structure, a little into the batter for balance
- Salt: Just a pinch to wake up all the flavors
- Egg whites: These are the magic. Beaten to stiff peaks, they're what gives the cake its souffle like rise and ethereal texture
- Egg yolks: Provide richness and help bind everything together
- Lemon juice: Cuts through the dairy just enough to keep things from feeling too heavy
- Vanilla extract: Use the good stuff if you have it. This cake is subtle enough that quality ingredients shine through
- Lemon zest: Optional, but I highly recommend it. Those little flecks of bright flavor make each bite interesting
Instructions
- Prep your cake pan like you mean it:
- Line both bottom and sides with parchment paper. Then wrap the entire outside of the pan with aluminum foil, crimping it tightly so no water can sneak in during baking. This matters.
- Melt the dairy trio together:
- Set a heatproof bowl over simmering water and add cream cheese, butter, and milk. Stir constantly until you have something silky smooth. Remove from heat and let it cool a bit. Hot batter will deflate your meringue later, and nobody wants that.
- Whisk in the dry ingredients:
- Sift cake flour, cornstarch, and salt directly into the warm dairy mixture. Whisk until you can't see any dry bits anymore. Take your time. Lumps are your enemy here.
- Add the yolks and flavorings:
- Pour in egg yolks, lemon juice, vanilla, and that lemon zest if you're using it. Whisk until the mixture is uniform and glossy. Set this aside and turn your attention to the most important part.
- Make the meringue:
- In a completely clean bowl, beat egg whites until they're foamy. Add that first portion of sugar gradually, letting it dissolve before adding more. Keep beating until you have stiff, glossy peaks that stand up straight when you lift the beaters. This is what makes the cake tall.
- Lighten the batter:
- Gently fold about one third of the meringue into your cream cheese mixture. Use a rubber spatula and fold from the bottom up. You're not mixing. You're incorporating air while keeping it intact.
- Fold in the remaining meringue:
- Add the rest of the meringue in two portions, folding just until no white streaks remain. The moment you start seeing streaks disappear, stop. Overmixing at this stage is how flat cheesecakes happen.
- Pour and settle the batter:
- Pour everything into your prepared pan. Give the pan a couple gentle taps on the counter to release any trapped air bubbles. You might see them rise to the surface and pop. That's good.
- Set up the water bath:
- Place your cake pan inside a larger roasting pan. Carefully pour hot water into the roasting pan until it reaches halfway up the sides of your cake pan. This steam is what keeps the cake moist and prevents cracks.
- Bake slowly and patiently:
- Slide the whole setup into the oven and bake for about an hour. You're looking for golden brown on top and a skewer that comes out clean. The cake might still have a slight wobble in the center. That's perfect.
- The cooling trick:
- Turn off the oven but leave the door slightly ajar. Let the cake rest inside for 15 minutes. This gradual temperature change is the secret to preventing those cracks that plague so many cheesecakes.
- Chill completely:
- Let it cool to room temperature in the pan, then refrigerate for at least two hours. The texture transforms as it chills, becoming even more delicate and creamy.
 Pin it
 Last Christmas, I made eight of these in one weekend for various gatherings. By the end, I had the timing down to a science, but the look on people's faces when they cut into that first slice never got old. It became the thing people started requesting weeks in advance.
The Science Behind The Wobble
That signature jiggly texture comes from the combination of beaten egg whites and the gentle steam baking of the water bath. The meringue provides structure while the water bath keeps everything moist and prevents the proteins from tightening too much. It's basically controlled chaos in cake form.
Make Ahead Magic
This cheesecake actually improves after chilling overnight. The flavors meld together and the texture becomes even more velvety. I always make it the day before serving, which has the added benefit of zero stress on the actual day of your gathering.
Serving Suggestions That Elevate Everything
A light dusting of powdered sugar right before serving makes it look like snow fell on a cloud. Fresh berries are the classic pairing. Their tart brightness plays perfectly with the subtle sweetness. Sometimes I'll add a tiny dollop of unsweetened whipped cream just to emphasize how light this cake truly is.
- Dont serve this cold from the fridge. Let it sit at room temperature for about 20 minutes for the best texture
- If you want to get fancy, a thin slice of fresh mango or a few passion fruit seeds on top adds beautiful color and tropical contrast
- Leftovers keep well in the refrigerator for up to three days, though in my experience they rarely last that long
 Pin it
 There's something deeply satisfying about serving a dessert that makes people pause and really savor each bite. This cheesecake isn't just sweet. It's an experience.
Recipe FAQ
- → Why is my Japanese cheesecake not fluffy?
-
Your cheesecake may lack fluffiness if the egg whites weren't beaten to stiff peaks or if the meringue was deflated during folding. Always beat egg whites until glossy and stiff, then fold gently in three additions to maintain airiness.
- → Can I substitute cake flour with all-purpose flour?
-
Cake flour is essential for the light, delicate texture. All-purpose flour will result in a denser cheesecake. If unavailable, you can make a substitute by measuring 1 cup of all-purpose flour and removing 2 tablespoons, then replacing with 2 tablespoons of cornstarch.
- → Why does the cheesecake crack during baking?
-
Cracking typically occurs from overbaking or sudden temperature changes. Using a water bath helps maintain moisture and prevent cracks. Also crucial: leaving the oven door ajar after baking for 15 minutes allows gradual cooling, reducing the risk of cracking.
- → How long should I chill the cheesecake before serving?
-
Chill for at least 2 hours in the refrigerator before serving. This allows the cheesecake to set completely and develop its signature jiggly yet stable texture. It actually tastes better the next day as flavors meld together.
- → What makes Japanese cheesecake different from New York style?
-
Japanese cheesecake incorporates whipped egg whites, creating a soufflé-like, airy texture similar to a cloud. New York style is dense, rich, and heavy with cream cheese and eggs. The Japanese version is much lighter, less sweet, and has a delicate, cotton-like consistency that literally melts in your mouth.
- → Can I make this cheesecake ahead of time?
-
Absolutely! In fact, Japanese cheesecake tastes even better on the second or third day. You can bake it up to 3 days in advance, store it tightly wrapped in the refrigerator, and serve when needed. The texture remains perfectly fluffy and the flavors continue to develop.
