 Pin it
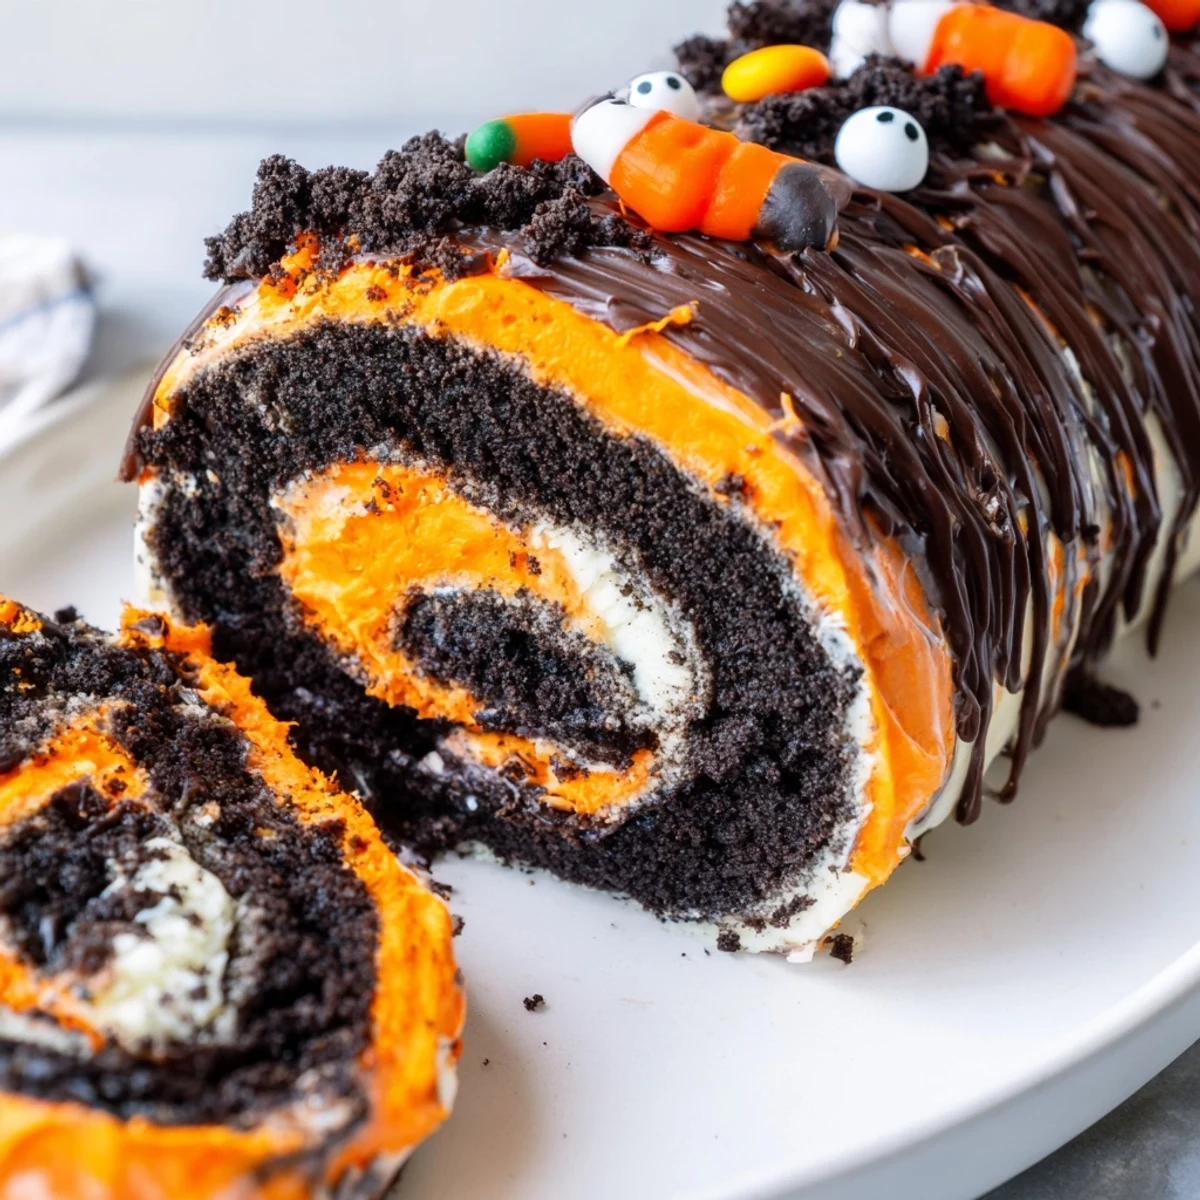
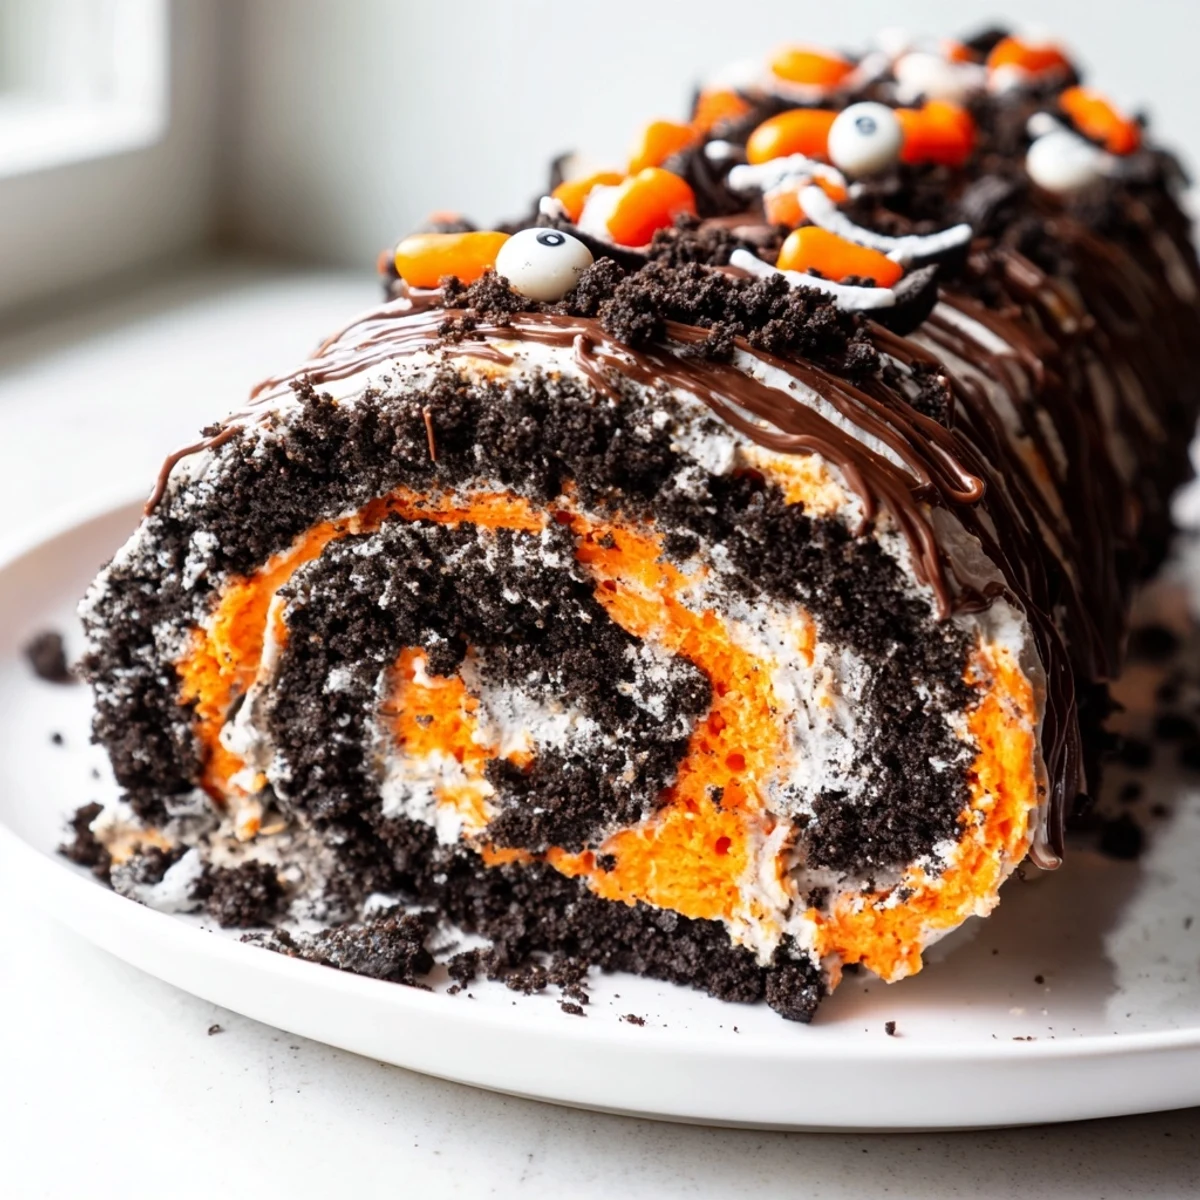
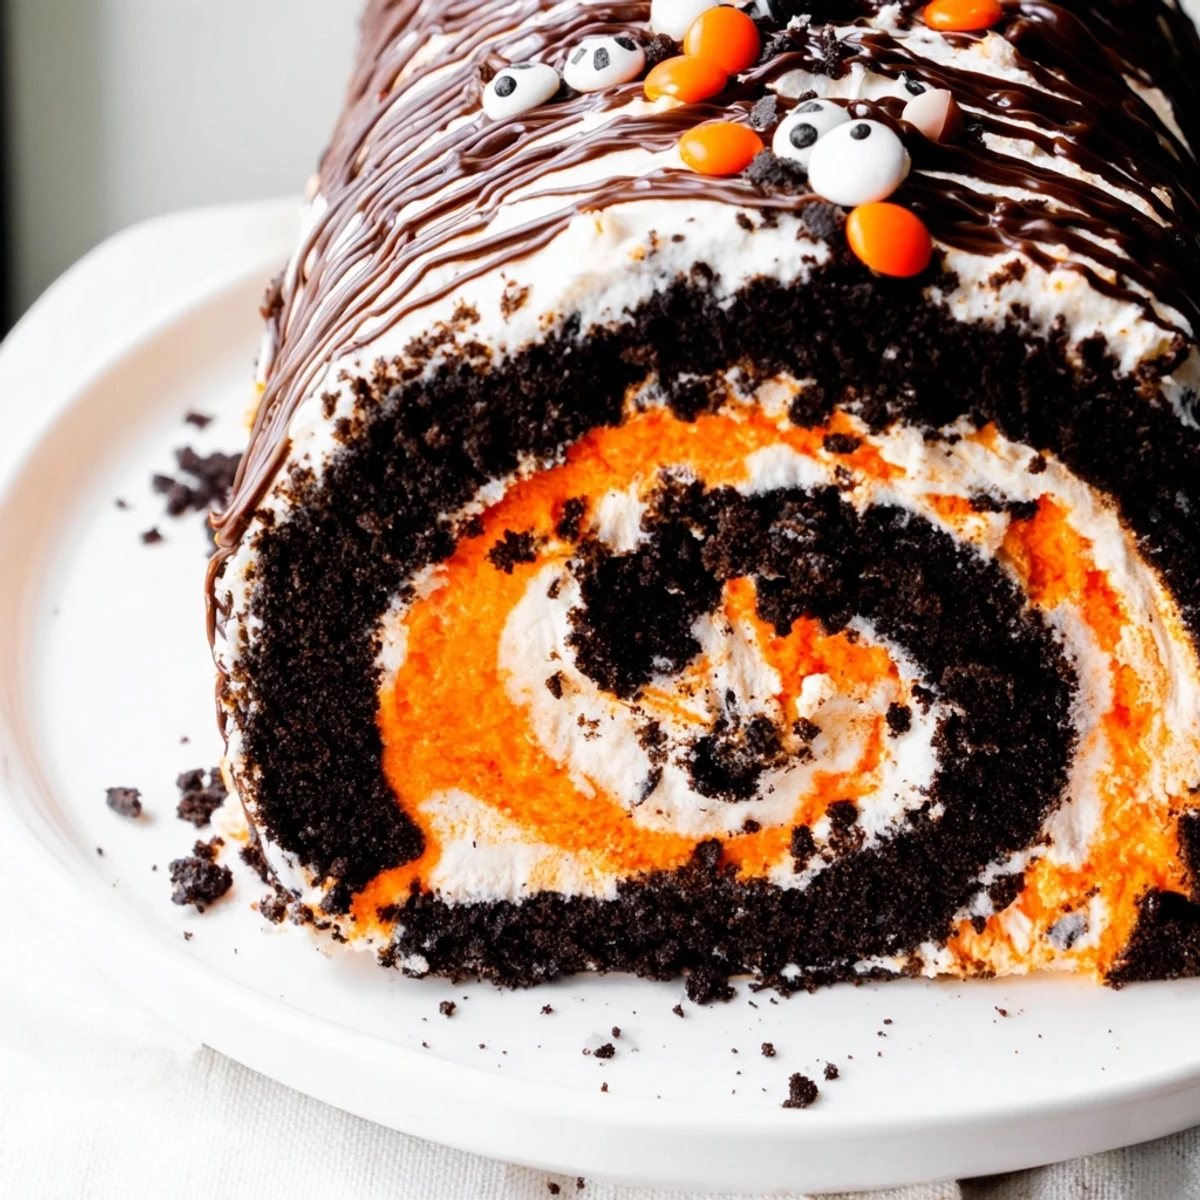
 This indulgent Halloween Oreo roll combines a chocolate cookie crust with vibrant colored whipped cream, creating a stunning swirled dessert perfect for spooky celebrations. The no-bake preparation makes it accessible for all skill levels, while the striking presentation—featuring orange and purple hues, sprinkles, and candy eyes—delivers maximum visual impact.
The dough comes together quickly by crushing Oreos and mixing them with butter, cream cheese, and powdered sugar. After rolling into a rectangle, you'll spread the stabilized whipped cream and roll everything into a log. An hour of chilling sets the structure, allowing for clean slices that reveal the beautiful spiral pattern inside.
Customization options include adjusting food coloring intensity, adding orange zest or cinnamon to the cream, or drizzling with melted chocolate. The dessert yields 12 slices and keeps well refrigerated for up to three days, making it ideal for advance preparation before Halloween gatherings.
My kitchen looked like a pumpkin explosion last October, and I wouldn't have it any other way. Orange specks dotted every surface, my hands were stained with food coloring, and my eight-year-old was vibrating with sugar anticipation. We'd decided last-minute to bring something to the neighborhood Halloween potluck, and this Oreo roll saved the day when we completely forgot to plan ahead.
When I pulled this log out of the refrigerator at the potluck, my friend Sarah actually gasped. The orange cream swirled with crushed black cookies looked striking against the white serving platter. Every single slice disappeared within fifteen minutes, and three people immediately asked for the recipe right there between bites of second helpings.
Ingredients
- 36 Halloween Oreos: The seasonal ones already have that perfect orange cream center, but regular Oreos work beautifully with food coloring added to your filling
- 1 cup powdered sugar: This sweetens the cookie base and helps bind everything together into that perfect rollable texture
- 6 tbsp unsalted butter, melted: Make sure its completely cooled slightly before mixing, or you'll end up with a greasy mess instead of a cohesive dough
- 4 oz cream cheese, softened: Room temperature is non-negotiable here—cold cream cheese creates stubborn lumps that will ruin your smooth cookie base
- 1 cup heavy whipping cream: Chill your bowl and whisk beforehand for faster, more stable peaks that hold their shape beautifully
- 1/4 cup powdered sugar: This sweetens the whipped cream without weighing it down like granulated sugar would
- 1 tsp vanilla extract: Use pure vanilla for that deep, warm flavor that balances all the sweetness
- Orange or purple food coloring: Gel coloring gives you more vibrant results with less liquid, which prevents your cream from deflating
- Halloween themed sprinkles: These aren't just for looks—they add delightful little crunches throughout every bite
- Candy eyes: Totally optional but absolutely hilarious when you place them strategically before serving
- Melted chocolate: The drizzle is the finishing touch that makes this look like a professional bakery creation
Instructions
- Prepare your workspace:
- Line a large baking sheet or your counter with parchment paper, making sure it extends beyond all edges. This will be your best friend when rolling everything together later.
- Make the cookie base:
- Pulse all those Oreos in your food processor until they resemble fine sand. Dump them into a bowl and add the powdered sugar, melted butter, and cream cheese. Mix until everything comes together into a sticky, pliable dough that holds its shape when squeezed.
- Roll it out:
- Place the dough between two sheets of parchment paper and roll it into a rectangle about half an inch thick. Don't stress about perfect edges—this is supposed to look rustic and inviting.
- Whip the cream:
- In your chilled bowl, beat the heavy cream with the powdered sugar and vanilla until stiff peaks form. Gently fold in your food coloring until the cream is evenly tinted that perfect Halloween orange or purple.
- Spread and roll:
- Spread the colored cream over your cookie base, leaving a one-inch border along one long edge. Using the parchment paper to guide you, roll everything into a tight log starting from the edge without the border.
- Chill thoroughly:
- Wrap your log securely and refrigerate for at least one hour. This step is crucial—trying to slice it too soon will give you a sad, squashed dessert instead of those beautiful spiraled rounds.
- Decorate and serve:
- Unwrap your chilled log and drizzle with melted chocolate. Pile on those sprinkles, add candy eyes if you're feeling playful, and slice into one-inch rounds with a sharp knife. Serve cold and watch faces light up.
 Pin it
 Last year, my daughter decided this wasn't just a dessert—it was the centerpiece of our Halloween spread. She arranged the slices on a platter in the shape of a caterpillar, complete with a candy-eyed head and curly antenna made from licorice. Sometimes the best moments come from letting kids take creative control in the kitchen.
Making It Ahead
This dessert actually tastes better after resting overnight, which makes it perfect for party planning. The cookie base softens slightly and melds with the cream, creating this incredibly cohesive texture that feels almost like a fancy cake. Just wrap it tightly and add the decorations right before serving.
Color Swaps
I've made this in deep purple for a more sophisticated Halloween look, and once I did a gradient that faded from orange to yellow like candy corn. You could even do multiple thin rolls in different colors and slice them together for a confetti effect that kids go absolutely wild for.
Serving Suggestions
These slices pair surprisingly well with a cup of black coffee or even a splash of spiced rum if you're hosting an adult gathering. The rich cream and cookie combination cuts through bitter drinks beautifully, creating that perfect dessert balance everyone craves.
- Set up a DIY toppings bar and let guests customize their own slices
- Cut them into bite-sized squares for easy party grazing
- Store any leftovers covered in the fridge for up to three days
 Pin it
 There's something magical about cutting into that spiral and watching everyone's eyes widen at thereveal. This recipe has become our family's most requested Halloween treat, and I suspect it might become yours too.
Recipe FAQ
- → Can I make this Oreo roll ahead of time?
-
Yes, this dessert actually benefits from chilling. You can prepare it up to 24 hours in advance and store it wrapped in the refrigerator. The flavors meld together nicely, and the texture becomes easier to slice cleanly.
- → What if I don't have Halloween Oreos?
-
Regular Oreos work perfectly—just add orange or purple food coloring to the crushed cookie mixture. Alternatively, you can use chocolate sandwich cookies and customize the filling colors to match your Halloween theme.
- → How do I prevent the roll from cracking when slicing?
-
Ensure the roll has chilled for at least one hour so the filling sets properly. Use a sharp knife and wipe it clean between slices. For cleaner cuts, you can briefly dip the knife in hot water and dry it before each slice.
- → Can I freeze this Halloween roll?
-
Freezing isn't recommended as the whipped cream filling can become grainy and lose its smooth texture when thawed. It's best enjoyed within three days when stored refrigerated in an airtight container.
- → What's the best way to crush the Oreos?
-
A food processor gives the finest, most consistent crumbs in about 30 seconds. If you don't have one, place the cookies in a sealed plastic bag and crush with a rolling pin or the bottom of a heavy pan until you achieve fine, even crumbs.
- → How do I get the filling to stay vibrant?
-
Use gel food coloring rather than liquid for more intense color without thinning the whipped cream. Add the coloring gradually while folding to reach your desired shade. Gel colors also hold up better during chilling time.
