 Pin it
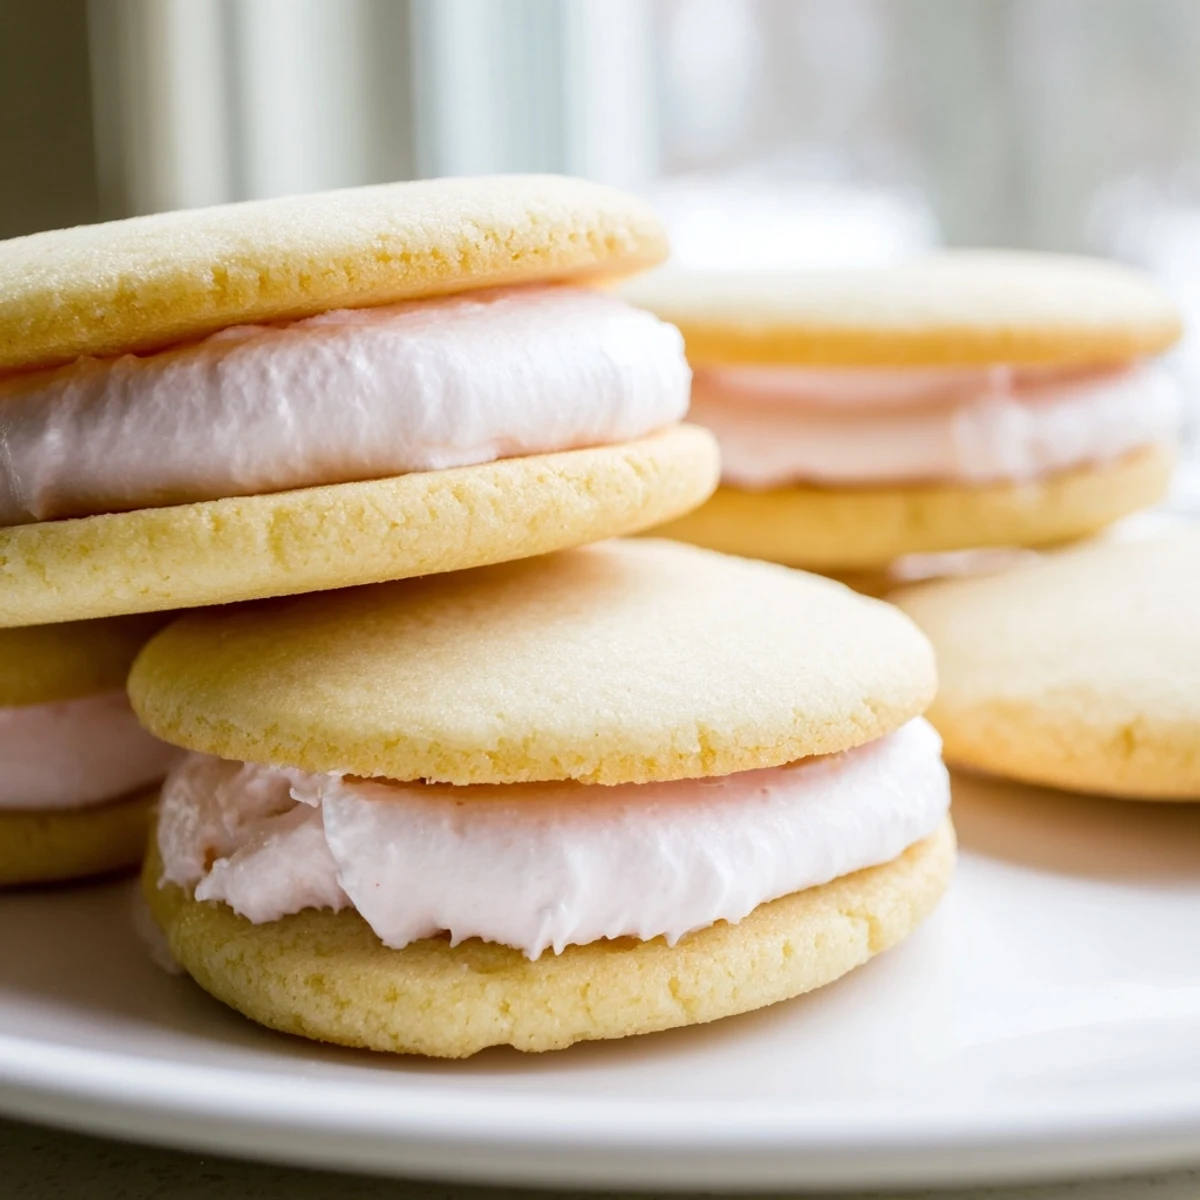
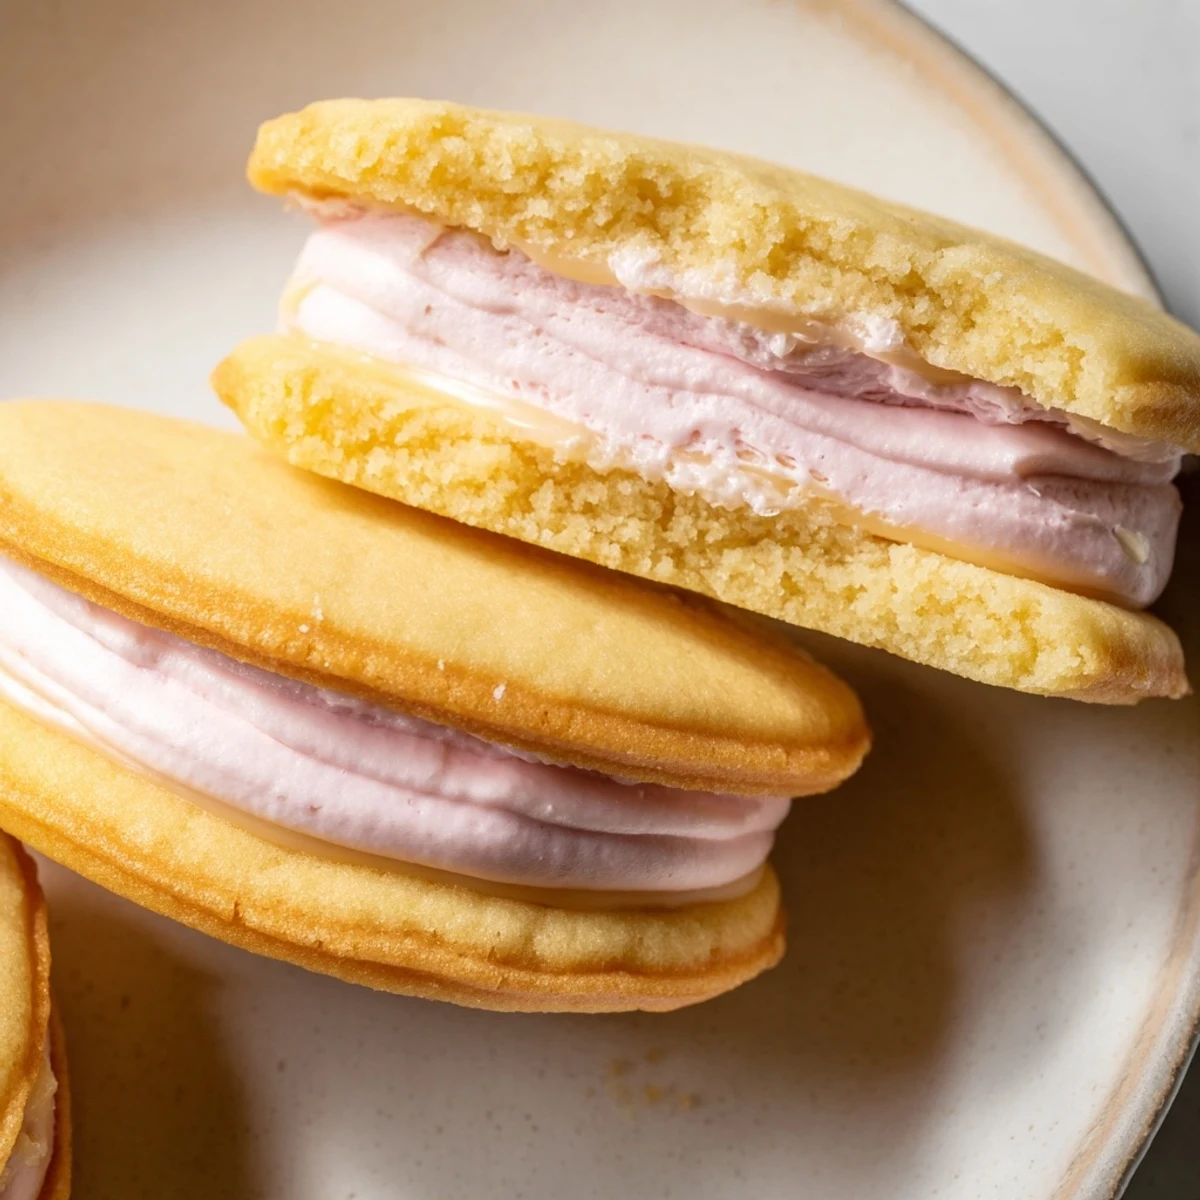
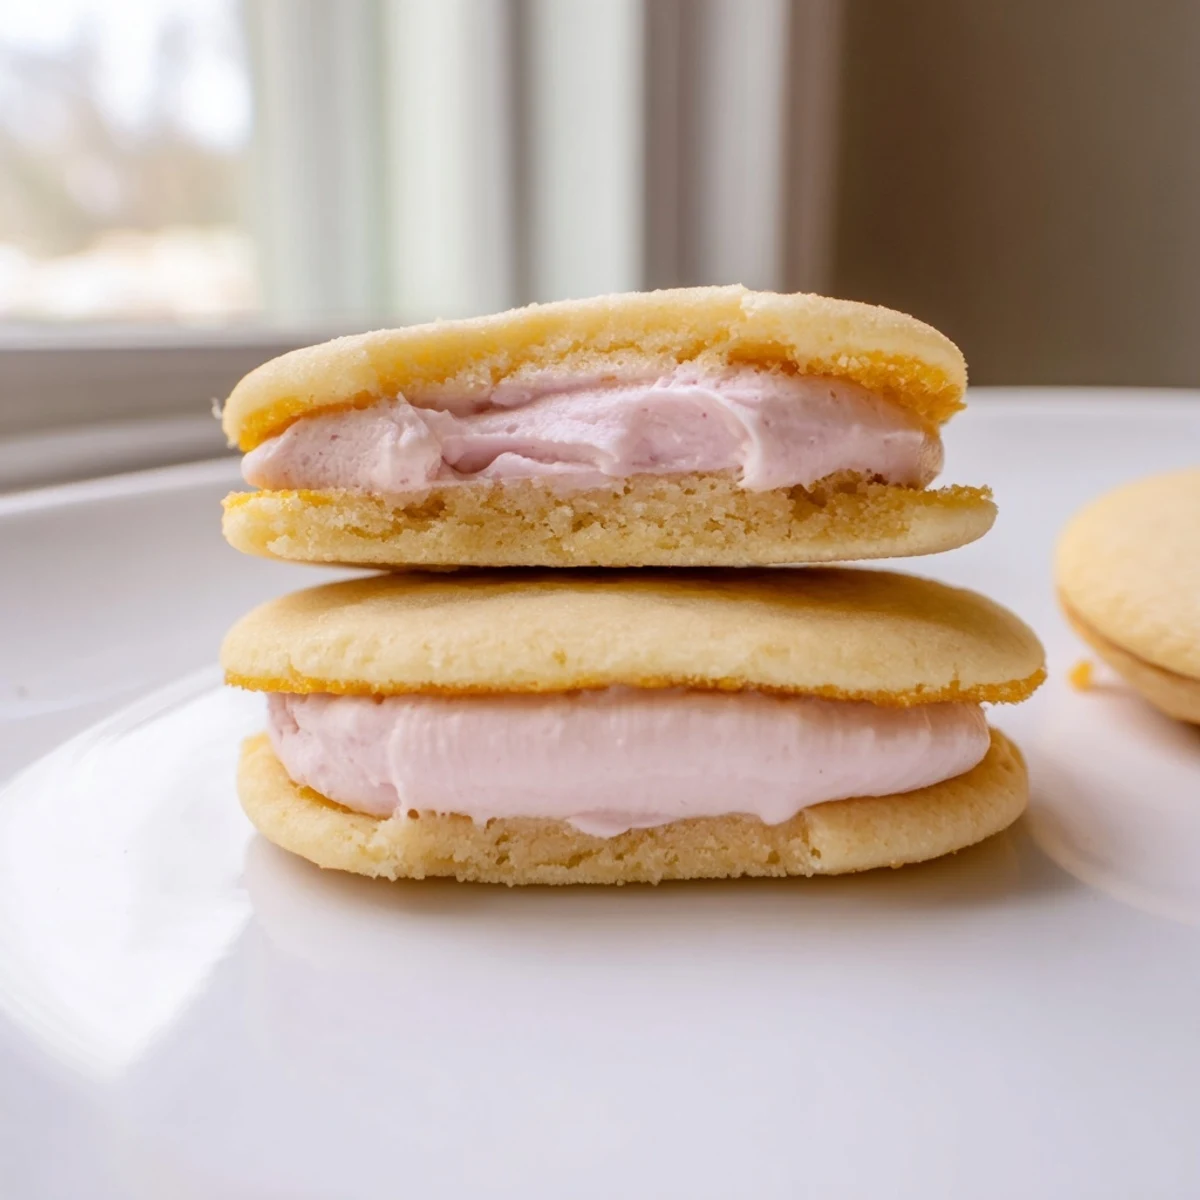
 Create these delightful sandwich cookies featuring tender sugar cookies paired with pastel-tinted buttercream. The dough requires chilling for easy rolling, while the fluffy filling can be customized with soft pink, yellow, green, blue, or purple hues. Perfect for Easter gatherings, baby showers, or garden parties, these handheld treats combine the classic comfort of sugar cookies with visual appeal. Roll the edges in matching sprinkles for extra celebration.
The first time I made these pastel sugar cookie sandwiches was for my niece's spring birthday party. I'd planned to make simple cookies but spotted gel food colors in my baking drawer and decided to get whimsical. When the guests arrived and saw those dreamy pink, mint, and butter yellow fillings peeking between the cookies, I actually heard someone gasp. Now they're my go-to whenever I need something that makes people smile before they even take a bite.
Last Easter I set up a decorating station and let my cousins choose their own color combinations. Someone went rogue and created a tie-dye filling by swirling multiple colors together, and honestly, it was genius. The cookies disappeared faster than I could assemble them, with little rainbow fingerprints everywhere. Sometimes the messiest moments make the best memories.
Ingredients
- 2 ½ cups all-purpose flour: Spoon and level your flour instead of scooping directly, which keeps these cookies tender instead of dense
- ½ teaspoon baking powder: Just enough lift to give the cookies a slight puff without spreading too thin
- ¼ teaspoon salt: Balances the sweetness and brings out the buttery flavor
- ¾ cup unsalted butter, room temperature: Let this sit out for a full hour so it blends seamlessly into the dough
- 1 cup granulated sugar: Cream this thoroughly with the butter for that classic sugar cookie crunch
- 1 large egg: Bring this to room temperature too so it incorporates evenly
- 1 teaspoon pure vanilla extract: Use the good stuff here since it's the primary flavor
- ½ cup unsalted butter, room temperature: For the buttercream, slightly cooler than room temp helps it hold its shape
- 2 cups powdered sugar, sifted: Sifting prevents lumpy frosting and makes it silky smooth
- 1 ½ tablespoons milk: Add this one teaspoon at a time until you reach your ideal consistency
- 1 teaspoon pure vanilla extract: This cuts through the sweetness and makes the filling taste professional
- Pinch of salt: Just a tiny amount transforms the buttercream from cloying to crave-worthy
- Pastel gel food coloring: Gel colors give you vibrant shades without thinning the frosting like liquid food coloring does
Instructions
- Whisk your dry ingredients together:
- In a medium bowl, combine the flour, baking powder, and salt until everything is evenly distributed
- Cream the butter and sugar:
- Beat them on medium speed for 2 to 3 minutes until the mixture looks pale and fluffy, which creates the perfect cookie texture
- Add the egg and vanilla:
- Mix until completely combined, scraping down the bowl to make sure everything is incorporated
- Incorporate the flour mixture:
- Gradually add the dry ingredients and mix just until you no longer see visible flour
- Chill the dough:
- Divide in half, flatten into discs, wrap tightly, and refrigerate for at least 30 minutes so the cookies hold their shape
- Preheat your oven:
- Heat to 350°F and line two baking sheets with parchment paper for easy cleanup
- Roll and cut the cookies:
- Roll the dough to ¼ inch thickness and cut rounds with a 2 inch cutter, placing them 1 inch apart on the prepared sheets
- Bake to perfection:
- Bake for 8 to 10 minutes until the edges are barely golden, then cool for 2 minutes on the sheets before transferring to racks
- Make the buttercream:
- Beat the butter until creamy, then gradually add powdered sugar, milk, vanilla, and salt until smooth and fluffy
- Create pastel colors:
- Divide the frosting among small bowls and tint each with a tiny amount of gel coloring, remembering a little goes a long way
- Assemble the sandwiches:
- Spread or pipe buttercream on half the cookies and top with the remaining halves, pressing gently to spread the filling to the edges
- Let them set:
- Wait 20 minutes for the buttercream to firm up slightly before serving or packaging
 Pin it
 My mom claims she can taste the difference between cookies made with love and rushed bakery versions. When I brought her a batch of these with lemon curd instead of buttercream, she took one bite and closed her eyes. Food has this magical way of storing our feelings inside it, serving them back to us later.
Making Them Ahead
The dough actually develops better flavor when wrapped and refrigerated overnight, so I often make it the day before I plan to bake. You can also freeze the dough discs for up to a month, thawing in the fridge before rolling. The unfilled baked cookies freeze beautifully too, just thaw and fill when you need them fresh.
Color Variations
Beyond the classic pastel palette, I've made these with autumn spice colors, Christmas reds and greens, and even a sophisticated ombre using different shades of the same color. Sometimes I leave some frosting plain white and stack them with the colored ones for extra contrast. The flavor combinations are endless too.
Serving Suggestions
These cookies deserve to be served on something pretty, like a vintage cake stand or your best serving platter. They're perfect alongside a cup of Earl Grey or as part of a dessert spread with macarons and tarts. For picnics, nestle them in parchment paper cups in a box so they don't slide around.
- Arrange on a tiered stand with fresh flowers for instant party decor
- Package individually in clear bags tied with ribbon for adorable party favors
- Set up a self-serve bar with different colored frostings and let guests build their own
 Pin it
 There's something so joyful about biting into these little clouds of sugar and color. Hope they bring as much delight to your kitchen as they've brought to mine.
Recipe FAQ
- → How long do these need to chill before baking?
-
The cookie dough requires at least 30 minutes of chilling time in the refrigerator. This step firms the butter, preventing cookies from spreading too much during baking and making the dough easier to roll to the perfect thickness.
- → Can I make the dough ahead of time?
-
Yes, the wrapped dough discs can be refrigerated for up to 2 days or frozen for up to 3 months. Thaw frozen dough overnight in the refrigerator before rolling and baking.
- → What type of food coloring works best?
-
Gel food coloring provides the most vibrant pastel shades without thinning the buttercream. Liquid coloring can make the filling too soft, while gel concentrates deliver intense color with minimal product.
- → How should I store these sandwich cookies?
-
Keep assembled cookies in an airtight container at room temperature for up to 3 days. Layer between parchment paper to prevent sticking. Avoid refrigeration as it can make the cookies stale.
- → Can I use different shapes besides rounds?
-
Absolutely! Use any cookie cutter shape that appeals to you—flowers, hearts, or stars all work beautifully. Just ensure you pair matching tops and bottoms when assembling the sandwiches.
- → Why did my cookies spread in the oven?
-
Excess spreading usually indicates the dough was too warm before baking or the butter was over-softened. Proper chilling and using room-temperature rather than melted butter helps maintain shape.
