 Pin it
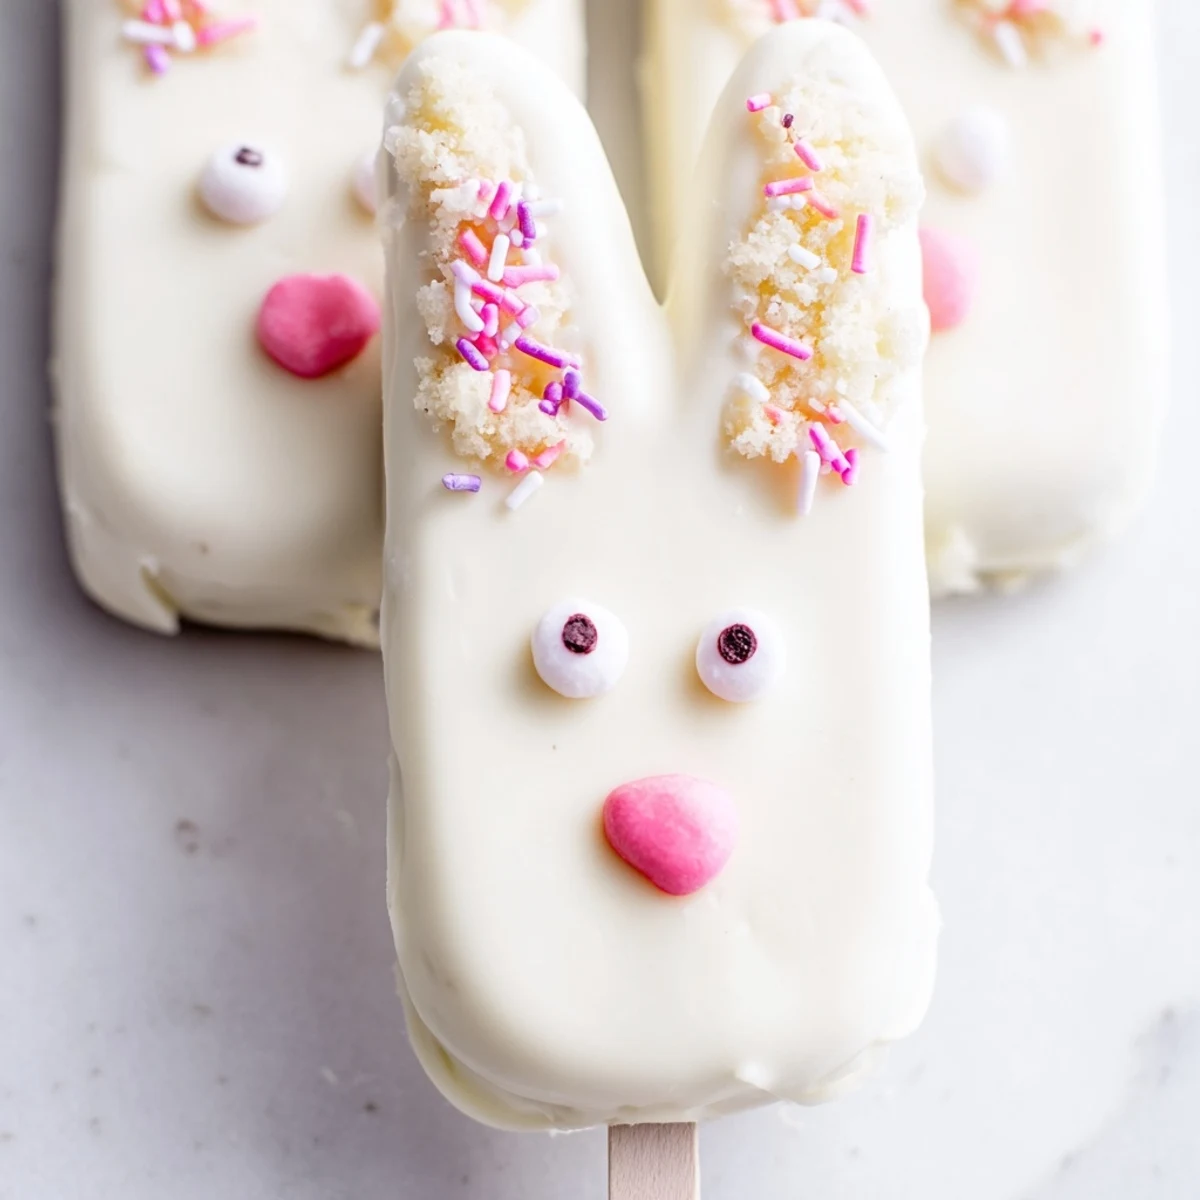
 These delightful bunny-shaped treats combine moist vanilla cake with creamy white chocolate coating for a festive Easter dessert. The cake mixture uses vanilla crumbs blended with cream cheese, butter, and powdered sugar for the perfect dough-like consistency. Each bunny face gets dipped in smooth white chocolate and decorated with candy eyes, sprinkles, or fondant features.
Preparation takes just 25 minutes with only 30 minutes needed for setting. You can customize with different cake flavors like chocolate or lemon, add marbled pink coloring to the coating, or get creative with fondant bunny ears and pretzels. Store these festive treats in the refrigerator for up to three days.
It was pouring rain that Saturday when I decided to turn a failed vanilla cake into something magical. The cake had collapsed in the middle, and I refused to let it go to waste. I crumbled it up, mixed it with cream cheese, and suddenly these little bunny shapes emerged from my kitchen counter.
Last Easter my niece grabbed one immediately and asked if the Easter Bunny himself had dropped them off. Watching her eyes light up while holding that little bunny face on a stick made all the chocolate mess worth it.
Ingredients
- Vanilla cake crumbs: These work best when slightly stale from a day or two ago
- Cream cheese: Room temperature is crucial for that smooth dough texture
- Unsalted butter: Adds just the right richness to bind everything together
- Powdered sugar: Sweetens the filling without making it grainy
- Vanilla extract: Pure vanilla extract makes all the difference here
- White chocolate: High quality melts smoothly and tastes incredible
- Edible gel food coloring: Perfect for those tiny bunny noses and ears
- Cakesicle sticks: Insert these before chilling or they will fall apart later
Instructions
- Mix the cake base:
- Combine all cake ingredients until the mixture holds together like soft dough
- Shape your bunnies:
- Form flattened ovals with slightly pointed tops for those adorable bunny ears
- Add the sticks:
- Press each stick about halfway into each bunny shape and refrigerate until firm
- Melt the chocolate:
- Heat in short bursts stirring between each until completely smooth
- Dip carefully:
- Submerge each bunny in chocolate tap gently and let excess drip off
- Decorate immediately:
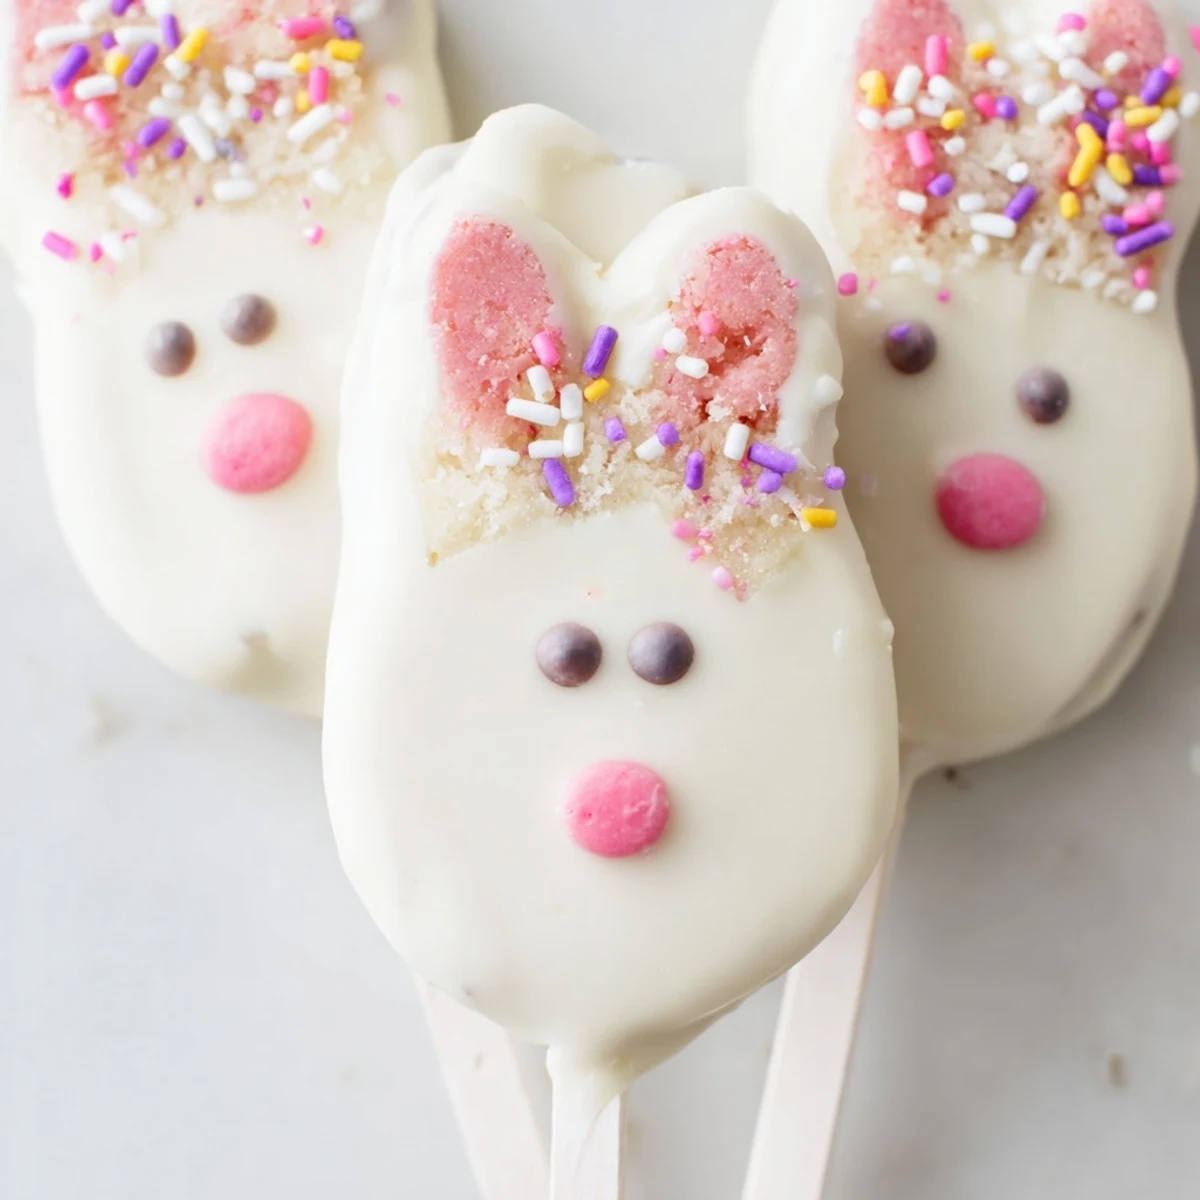
- Add candy eyes sprinkles or fondant details before the chocolate sets
- Let them set:
- Rest at room temperature until the coating is completely firm
 Pin it
 My friend Sarah made these for her daughters class party and said the kids actually fought over the last one. Nothing quite beats seeing a child carefully choose which bunny they want based on the sprinkles.
Making Them Ahead
I learned the hard way that these store beautifully in the refrigerator for days. Just keep them in an airtight container and they stay perfectly fresh for your Easter gathering.
Custom Flavors
Chocolate cake crumbs work stunningly well with the white chocolate coating. Lemon cake creates such a fresh spring flavor that everyone asks for the recipe.
Decoration Ideas
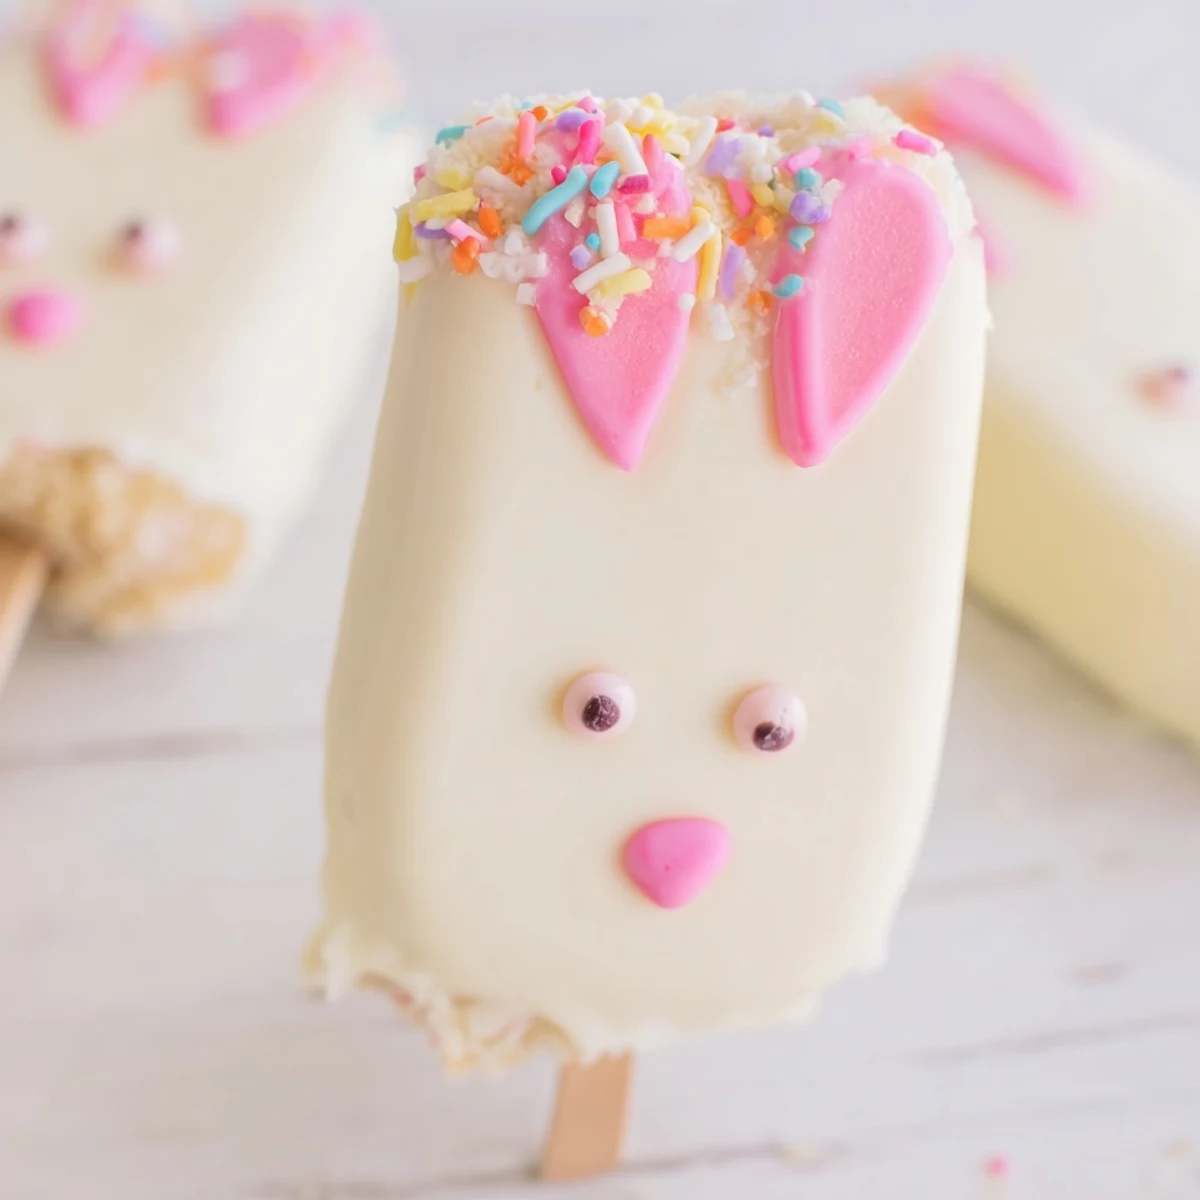
Sometimes I dip just the ears in colored chocolate for an extra festive touch. The contrast between white and pink or yellow looks absolutely stunning on a platter.
- Use edible markers for tiny whiskers after the chocolate sets
- Crushed graham crackers make adorable furry texture
- Keep melted chocolate warm in a bowl over hot water
 Pin it
 These little bunny cakesicles bring such joy to Easter celebrations. Hope they hop right into your familys holiday traditions.
Recipe FAQ
- → How long do white chocolate bunny cakesicles stay fresh?
-
Store your cakesicles in an airtight container in the refrigerator for up to 3 days. The moisture from the cake and cream cheese mixture stays fresh when chilled, while the white chocolate coating maintains its smooth texture.
- → Can I use different cake flavors for the filling?
-
Absolutely! While vanilla works beautifully, you can substitute chocolate cake crumbs, lemon cake, or even red velvet for variety. Each flavor pairs wonderfully with the creamy white chocolate coating and adds a unique twist to your Easter treats.
- → What's the best way to melt white chocolate for coating?
-
Melt white chocolate in a microwave-safe bowl using 30-second intervals, stirring thoroughly between each burst. This prevents overheating and seizing. The chocolate should be smooth and fluid for easy dipping. If it's too thick, add a teaspoon of coconut oil to reach the right consistency.
- → Do I need a special cakesicle mold for these bunny treats?
-
A molds helps achieve uniform shapes, but they're not essential. You can hand-shape the cake mixture into flattened bunny face ovals and insert the sticks manually. Just make sure the shapes are compact enough to hold together when dipped in the warm chocolate coating.
- → What decorations work best for bunny cakesicles?
-
Candy eyes, pink sprinkles for noses, and fondant or modeling chocolate for ears create adorable bunny faces. You can also use pretzel sticks for whiskers, pink food coloring gel for cheeks, or swirl pastel coloring into the white chocolate for a marbled effect. Let your creativity shine!
