 Pin it
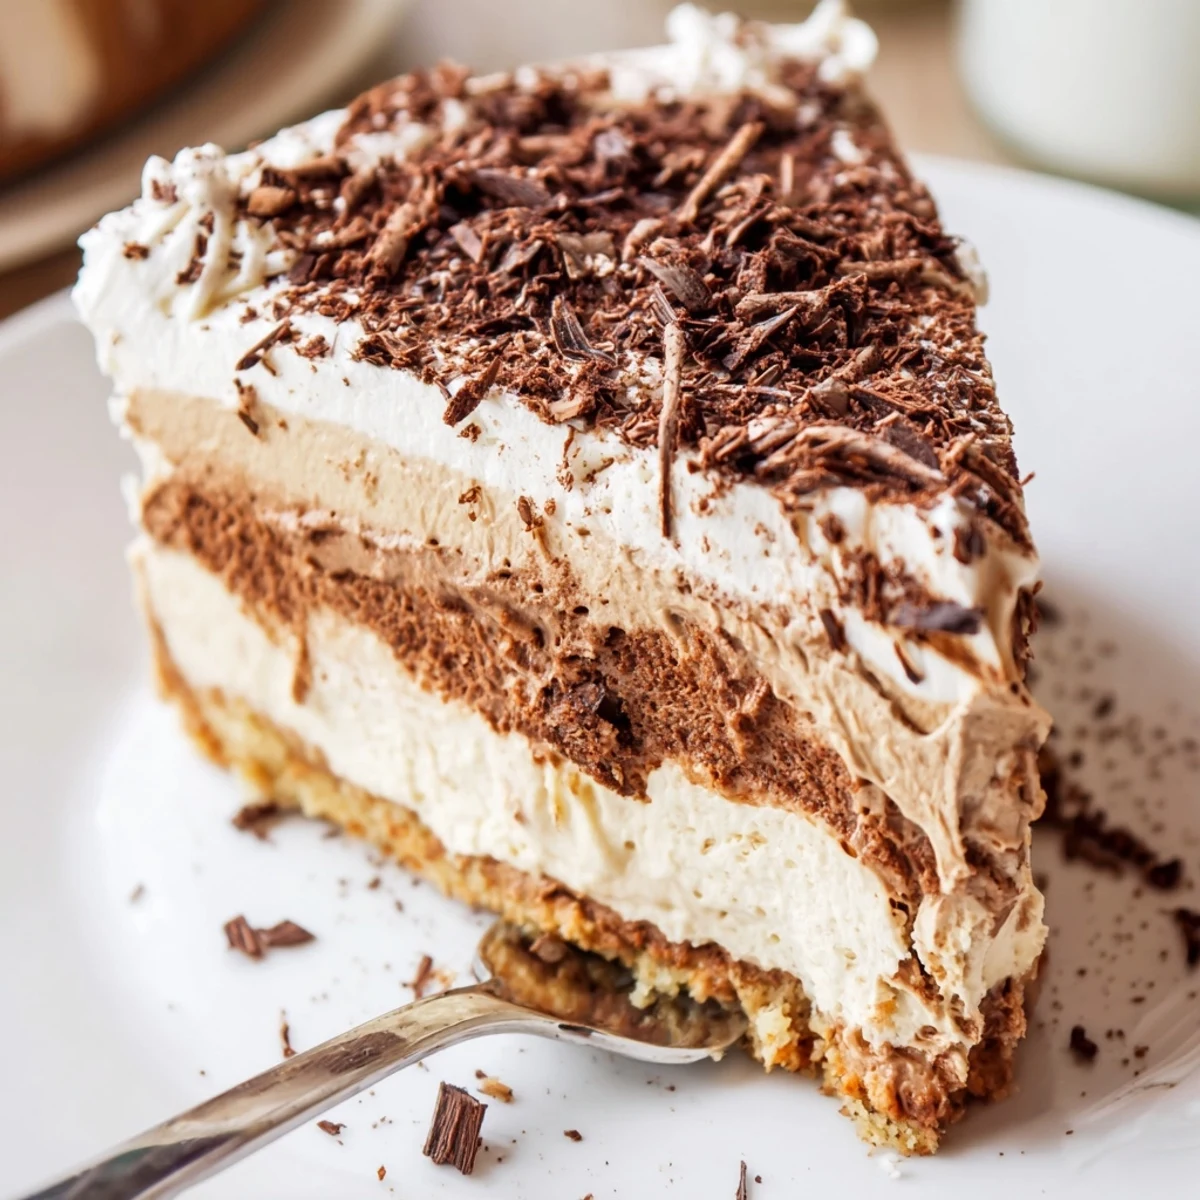
 This decadent coffee-infused tiramisu cheesecake begins with a crunchy ladyfinger crust blended with espresso and butter, then a smooth cream cheese–mascarpone filling flavoured with brewed espresso and vanilla. Bake in a water bath until just set, cool slowly, then chill for several hours. Top with whipped cream, dust with cocoa and add chocolate shavings for a silky, coffee-forward finish.
The first time I played around with this tiramisu cheesecake, the coffee scent completely enveloped my kitchen and made it impossible not to sneak a taste. It was a rainy afternoon and the sound of the mixer was oddly comforting as I brushed espresso over the crust, feeling a little like a scientist testing boundaries. The cheesecake promised decadence—every ingredient felt like an invitation to linger a bit longer in the kitchen. Even before slicing, I knew this one was trouble (in the best way).
Serving this at my friend’s birthday, I remember a hush falling over the room at the first bite—it was the silence of pure satisfaction. I’d worried the cocoa powder would be too much, but it added just the right hint of grown-up chocolate to the finish. Watching everyone go back for seconds, I felt a quiet pride, and even the tiniest leftovers quickly vanished.
Ingredients
- Ladyfinger biscuits: These give the crust an authentic tiramisu flavor; pulsing to fine crumbs lets everything bind together perfectly under the cheesecake.
- Unsalted butter: Melted and mixed in, it ensures the crust holds its shape and gains buttery richness.
- Instant espresso powder: This intensifies the coffee notes right in the base, so every bite is a wake-up call.
- Cream cheese: Make sure it’s softened to avoid lumps, resulting in that prized silky texture for the filling.
- Mascarpone cheese: Adds authentic Italian creaminess—let it sit at room temperature before mixing for the fluffiest cheesecake.
- Granulated sugar: Provides the right level of sweetness and ensures the cake sets properly.
- Large eggs: Add them one by one for a creamy, cohesive batter—no rushing here.
- Strong brewed espresso: Cool it before adding to the filling so you don’t curdle the cheeses—this is key for a balanced, bold flavor.
- Vanilla extract: A couple teaspoons warm everything up; good vanilla always stands out against coffee and cream.
- All-purpose flour: Just enough to help the cheesecake set while keeping things tender.
- Salt: Only a pinch, but it brightens all the other flavors in sneaky ways.
- Hot espresso (for the soak): This is brushed onto the crust and later sometimes the top, infusing extra coffee depth.
- Coffee liqueur (optional): Adds a grown-up kick, but skip it if serving kids or abstaining.
- Powdered sugar: Blends easily into whipped cream without graininess.
- Heavy cream: Whip to stiff peaks for dramatic, luscious topping.
- Unsweetened cocoa powder: A generous dusting right before serving completes the classic tiramisu finish.
- Dark chocolate shavings (optional): If you want to show off or add an extra layer of decadence, don’t skip this garnish.
Instructions
- Get the oven and pan ready:
- Preheat your oven to 160°C (325°F) and line a 23cm springform pan—wrapping foil around the base for the water bath always saves heartache.
- Build the crust:
- Pulse ladyfingers to rainy-day sand in a food processor, then stir in melted butter and espresso powder; press firmly into the pan and inhale that fresh coffee aroma. Bake for 10 minutes just to set, then let it cool.
- Mix up the coffee soak:
- Dissolve sugar in hot espresso and stir in coffee liqueur if you like, then set it aside—it’ll smell like a little Italian café for a while.
- Make the silky filling:
- Beat cream cheese, mascarpone, and sugar till shiny and smooth, pausing to scrape the bowl; add eggs one at a time, then gently blend in espresso, vanilla, flour, and salt. No overmixing—just a couple of slow, loving turns does the trick.
- Coffee up the crust:
- Brush or drizzle half the coffee soak all over the cooled crust, letting it soak in without making it soggy.
- Add the filling:
- Pour in the cheesecake batter, smoothing the top; tap the pan to shoo away bubbles and marvel at the sheen.
- Bake slow and steady:
- Bake in a water bath for 60 minutes—watch for just-set sides and a slight jiggle in the center, then cool inside the cracked oven for an hour to avoid cracks.
- Chill out:
- Let the cheesecake come to room temperature, then refrigerate for at least 4 hours (overnight if you can resist).
- Whip it good:
- Whip heavy cream, powdered sugar, and vanilla to stiff peaks, feeling like you’re crafting a cloud.
- Finish and garnish:
- Release the cake, brush with remaining coffee soak if you’re feeling decadent, and crown the top with whipped cream and a blizzard of cocoa and chocolate shavings. Slice and serve chilled, then pause to admire your handiwork.
 Pin it
 I remember a chaos of spoons clinking against plates as we all argued over the last slice; someone even tried sneaking a forkful straight from the fridge later that night. It’s the kind of dessert that becomes part of the conversation, long after the party wraps up.
How to Get the Cleanest Slices
I always keep a tall glass of hot water by my side—dipping and wiping the knife between each cut turns slices from messy to magazine-worthy. It’s a small detail that makes serving feel extra polished.
Choosing Your Coffee
Freshly brewed espresso makes a noticeable difference in depth and aroma, but I’ve also used strong French press in a pinch. The stronger the coffee, the more impressive the flavor—you want it to hold its own against all that rich cheese.
Make-Ahead For Stress-Free Entertaining
This cheesecake is a dream for stress-free parties because the chilling actually improves the flavor and texture. I like making it the night before, giving the coffee and mascarpone time to fully meld for the most harmonious bite.
- Decorate just before serving to keep whipped cream fresh.
- Store leftovers tightly covered for up to three days in the fridge.
- Let cheesecake sit at room temperature for 10 minutes before slicing for the smoothest texture.
 Pin it
 A slice of this cheesecake makes any gathering memorable—and if you find yourself sneaking an extra bite late at night, you’re in good company. Enjoy each layer, each creamy forkful, as an edible celebration.
Recipe FAQ
- → Why use a water bath?
-
A water bath provides gentle, even heat that prevents cracking and ensures the filling sets uniformly, giving a smooth, custardy texture without overbaking the edges.
- → How do I prevent cracks on the surface?
-
Avoid overmixing, bake until the center is just set (it should still jiggle slightly), cool the oven with the door ajar, and allow the cake to cool gradually before chilling to minimize cracks.
- → Can I skip coffee liqueur?
-
Yes. Omit the liqueur and use extra espresso or a touch more sugar in the soak for the same depth of coffee flavour without alcohol.
- → What can I use instead of ladyfingers?
-
Digestive biscuits or graham crackers work well for the crust; pulse them to fine crumbs, mix with melted butter and a pinch of espresso powder to keep the coffee notes.
- → How long should it chill before serving?
-
Chill for at least 4 hours, ideally overnight. Extended chilling firms the filling and melds the coffee flavours for the creamiest texture and best sliceability.
- → Can this be made ahead or frozen?
-
Make ahead and refrigerate up to 48 hours; for longer storage, freeze without whipped topping for up to one month, then thaw in the fridge and add fresh whipped cream and cocoa before serving.
