 Pin it
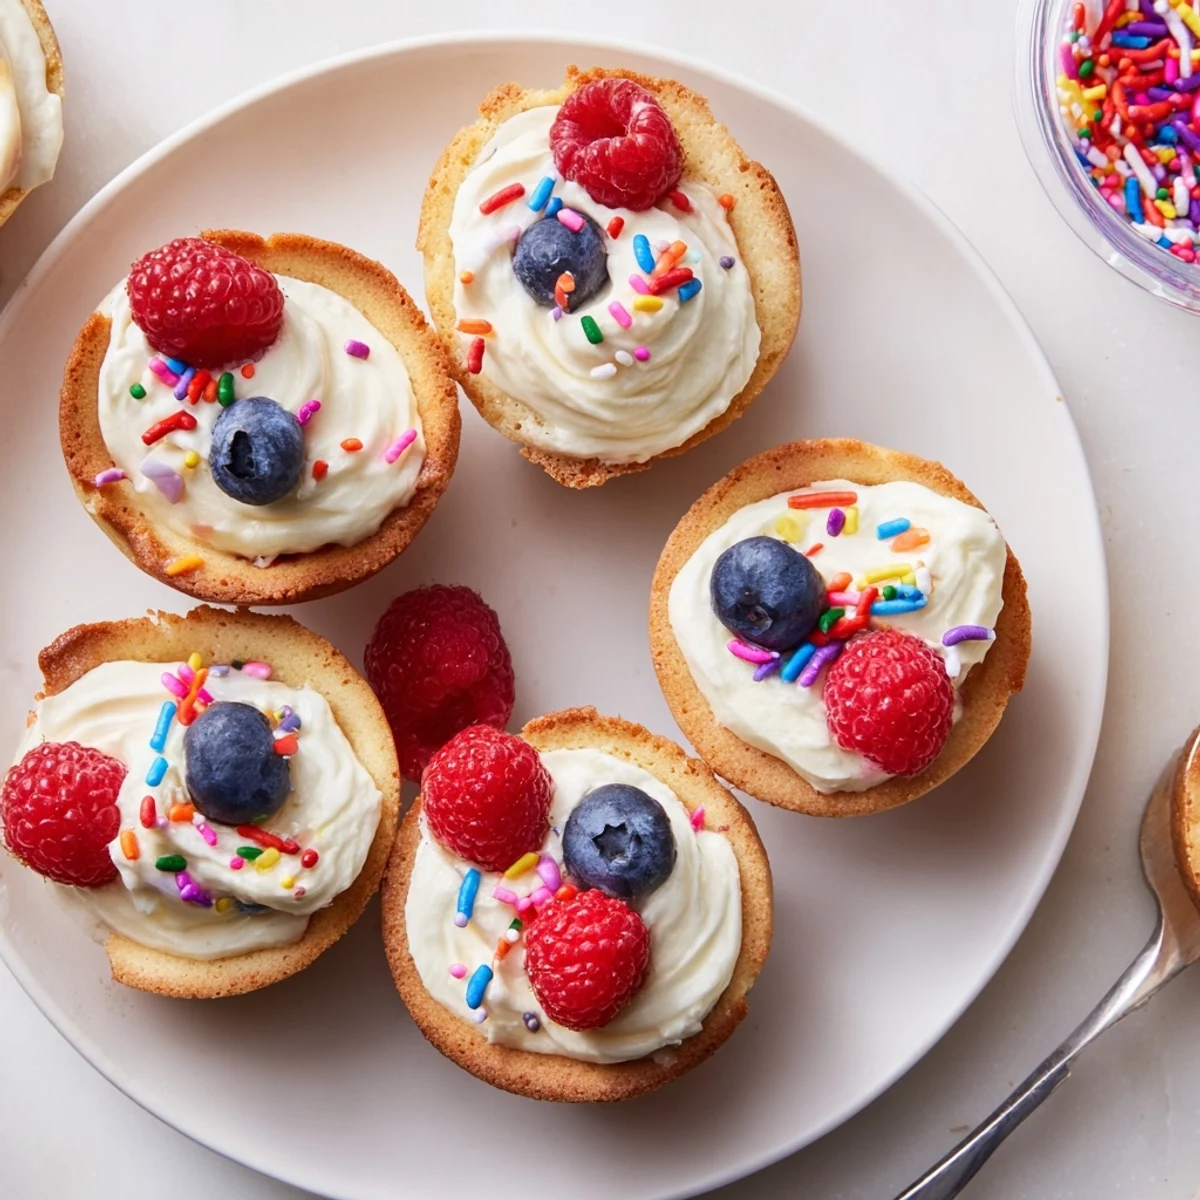
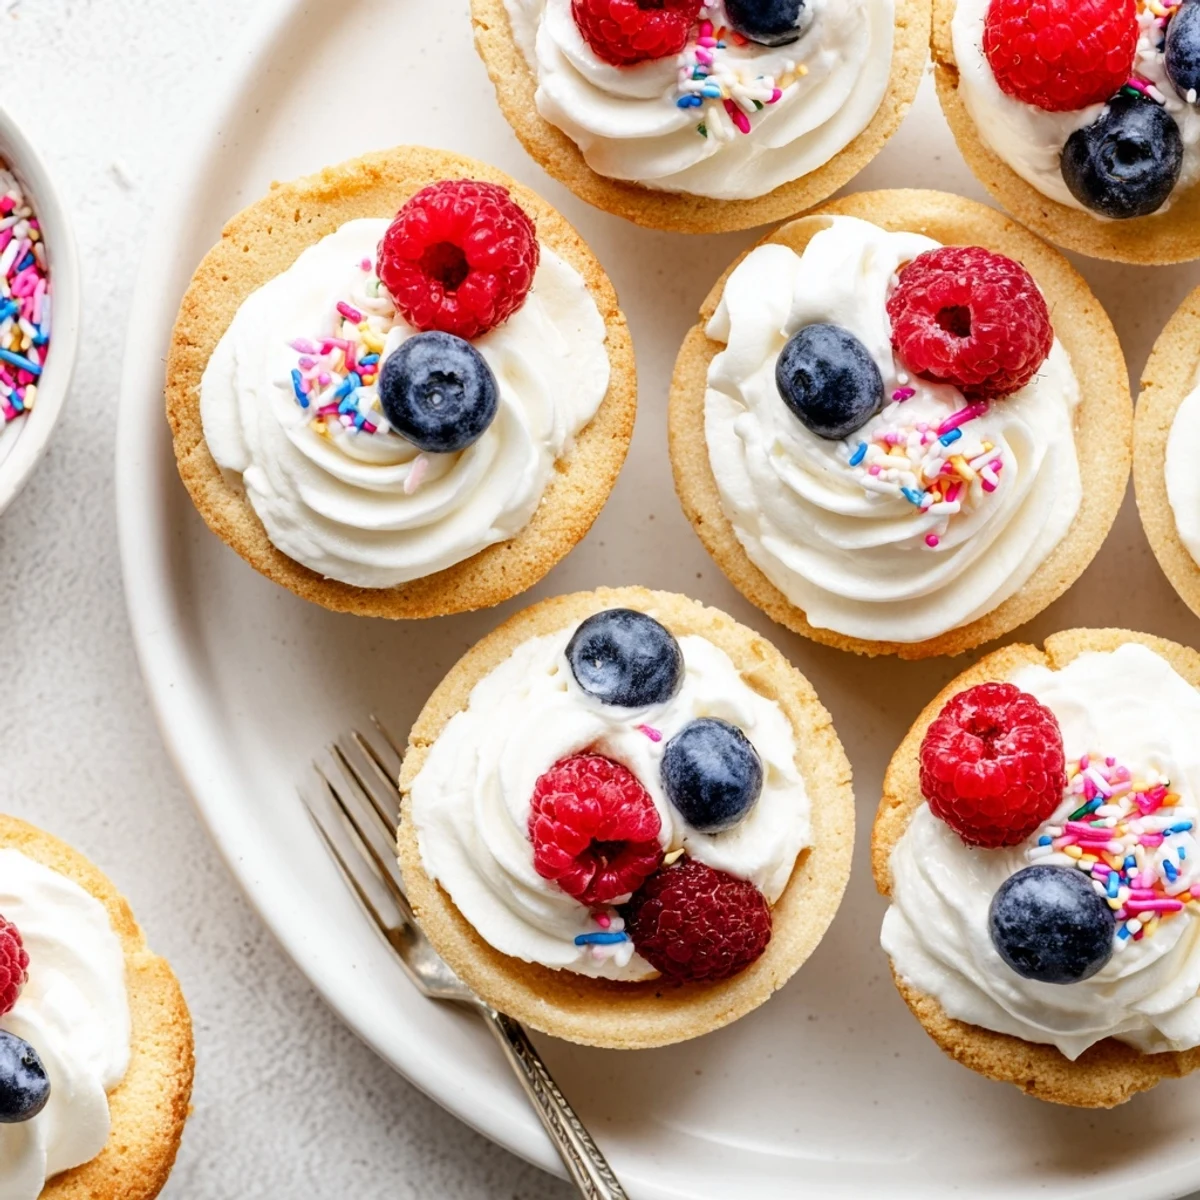
 These delightful sugar cookie cups are baked in mini muffin tins until lightly golden, then filled with sweet whipped vanilla cream and topped with fresh berries, sprinkles, or chocolate chips. The buttery cookie shells provide the perfect vessel for creamy fillings, making them an ideal handheld dessert for parties, holidays, or special occasions.
With just 10-12 minutes of baking time and simple pantry ingredients, you can create two dozen adorable treats that both kids and adults will love. Fill them with lemon curd, chocolate ganache, or your favorite frosting for endless flavor variations.
My daughter's third-grade class was having a spring celebration, and I'd somehow volunteered to bring treats. The night before, I stood in my kitchen wondering how to make sugar cookies feel special without spending hours decorating. That's when I grabbed my mini muffin tin and started pressing dough into the cups like little edible bowls.
When I brought that first batch to school, the kids' eyes lit up at the tiny edible cups filled with cream and berries. The teacher even asked for the recipe, and suddenly I was the mom who made those cute cookie things. Now they're my go-to whenever I need something that feels festive but doesn't require fancy decorating skills or three hours of free time.
Ingredients
- All-purpose flour: This creates the structure that holds the cup shape without spreading too much in the oven
- Baking soda: Just enough lift to give the cups a tender crumb without puffing up and losing their shape
- Salt: Enhances the vanilla and balances the sweetness so the flavors really pop
- Unsalted butter: Room temperature butter creams perfectly and creates those delightfully crisp edges
- Granulated sugar: Gives the classic sugar cookie crunch and helps the cups hold their shape
- Egg: Binds everything together and adds richness for that bakery-style texture
- Pure vanilla extract: Don't skimp here because vanilla is the backbone of that comforting sugar cookie flavor
- Heavy cream: Cold cream whips into clouds that pair perfectly with the buttery cookie cups
- Powdered sugar: Sweetens the cream just enough without making it cloyingly sweet
Instructions
- Preheat your oven to 350F and grease the mini muffin tin:
- I use a paper towel with a little butter or cooking spray making sure to get into all those tiny corners
- Whisk together the flour baking soda and salt:
- Set this bowl nearby so you're not scrambling mid-recipe with flour-covered hands
- Beat the butter and sugar until fluffy:
- About two minutes on medium speed gives you that pale creamy mixture that promises tender cookies
- Add the egg and vanilla:
- Scrape down the sides of the bowl because we want everything evenly incorporated
- Mix in the dry ingredients gradually:
- Stop as soon as the flour disappears because overmixing makes tough cookies
- Shape the cookie cups:
- Use about one tablespoon of dough per cup pressing it up the sides like a tiny bowl with your fingers
- Bake until golden:
- Ten to twelve minutes is perfect but keep an eye on them after ten because ovens vary
- Press the centers while warm:
- Use the back of a spoon to deepen that well right after they come out of the oven
- Let them cool completely:
- Ten minutes in the tin then transfer to a rack because warm cups make sad melty filling
- Whip the cream filling:
- Cold bowl cold cream and patience will give you clouds that hold their shape beautifully
- Fill and garnish:
- Use a small spoon or piping bag and add your favorite toppings right before serving
 Pin it
 Last Christmas my niece suggested we make an assembly line with different fillings and toppings. We ended up with lemon curd some chocolate ganache and that classic vanilla cream each marked with different sprinkles so guests could choose their adventure. Seeing everyone mix and match made me realize these cookie cups are really just little edible plates for whatever creativity strikes.
Making Them Ahead
I've learned through plenty of party prep that these cups store beautifully unfilled for up to three days in an airtight container. The morning of your event just whip the cream and fill them so they taste freshly made. This trick has saved me more times than I can count when I'm trying to juggle multiple dishes for a gathering.
Filling Ideas Beyond Cream
Sometimes I fill these with chocolate pudding and top with shaved chocolate for an instant chocolate cup dessert. Lemon curd with a tiny raspberry on top feels incredibly elegant for how simple it is. I've even used cookie butter inside and nobody has ever complained about that particular experiment.
Getting The Shape Right
The first few times I made these I ended up with shallow bowls that couldn't hold much filling. I discovered that using my thumb to press the dough first then going back with the back of a small measuring spoon creates perfect deep wells. If the dough feels too sticky and sticks to your fingers lightly flour them first.
- A small cookie scoop makes portioning the dough incredibly consistent
- If your cups puff too much in the oven press them again immediately after baking
- Work quickly when pressing warm centers because the dough firms up fast
 Pin it
 There's something deeply satisfying about handing someone a tiny edible cup filled with cream and watching their face light up. These little cookies have turned into my secret weapon for bringing joy without the stress.
Recipe FAQ
- → How do I prevent the cookie cups from sticking to the muffin tin?
-
Lightly grease your mini muffin tin with butter or cooking spray before adding the dough. Allow the cups to cool in the tin for about 10 minutes after baking, then carefully loosen the edges with a small knife or offset spatula before transferring to a wire rack.
- → Can I make the cookie dough ahead of time?
-
Yes, you can prepare the cookie dough up to 2 days in advance and store it tightly wrapped in the refrigerator. Let the dough soften slightly at room temperature for 10-15 minutes before scooping into the muffin tins for easier shaping.
- → What other fillings work well besides whipped cream?
-
Lemon curd, chocolate ganache, cream cheese frosting, Nutella, fruit preserves, pastry cream, or even ice cream just before serving all make excellent fillings. The buttery cookie shells complement almost any sweet or creamy filling.
- → How should I store filled versus unfilled cookie cups?
-
Store unfilled cookie cups in an airtight container at room temperature for up to 3 days. Fill them just before serving for the best texture. Once filled with cream or perishable fillings, store in the refrigerator and consume within 24 hours.
- → Can I freeze the baked cookie cups?
-
Absolutely! Bake and cool the cookie cups completely without filling, then freeze in a single layer before transferring to a freezer-safe bag for up to 3 months. Thaw at room temperature and fill when ready to serve.
- → Why do I need to press the center again after baking?
-
The cookie dough puffs up slightly during baking, reducing the cup shape. Gently pressing the center with a spoon while still warm helps reshape the cups, creating more space for your filling and ensuring a deep well to hold the cream or toppings.
